Holiday and seasonal decorating is always fun and special for me. And no space is ever completely decorated until it has one important accessory - fragrance.
With these contained aromas, you can enjoy the scent without ever lighting a candle or keeping an eye on it. Place the jar near sunlight or a warm lamp—or give it a gentle shake now and then—to refresh or deepen the fragrance.
This is one of the simplest projects to put together while having fun with the choices.
But that doesn’t mean we toss everything in at random... it's how you layer, pair, and arrange your "ingredients" that turns each jar into a unique mini display.
Taking the time to work out the arrangement is half the creative fun!
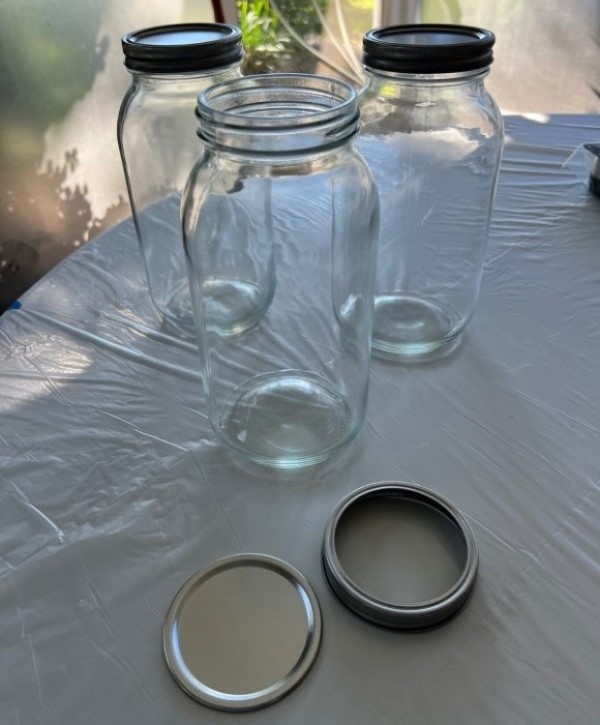
I decided to use half-gallon mason jars — they are easier to work with and they provide a nice view of the items inside.
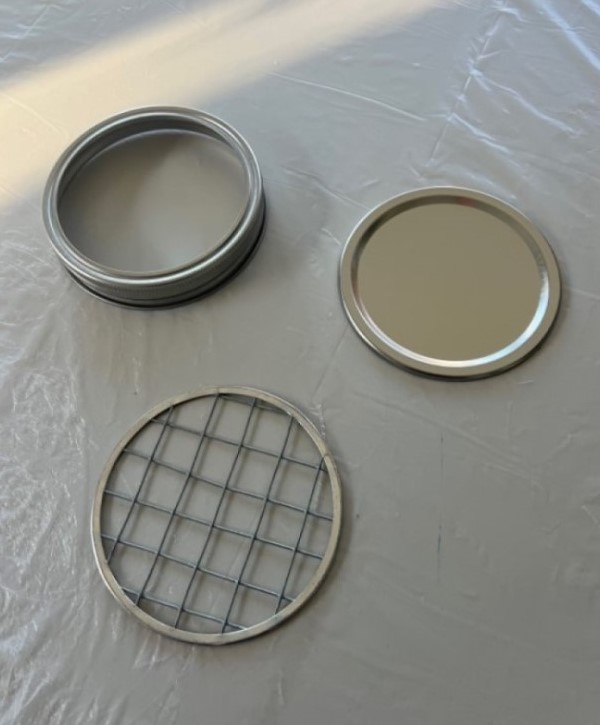
Be sure to purchase floral grid cap replacements.
The grid will keep the items inside while allowing the fragrance to escape.
Careful to get the right size floral grid for your jars and caps. I purchased a size too small the first time I made these.
IMPORTANT: If you plan to display your jars only on special occasions/holidays, make sure you replace the floral grid with the original lid before you store them away. You want to keep the fragrance sealed in.
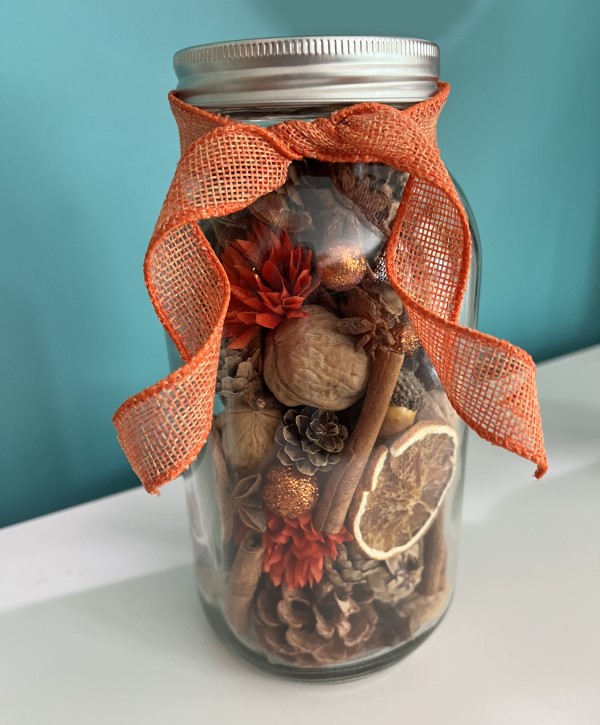
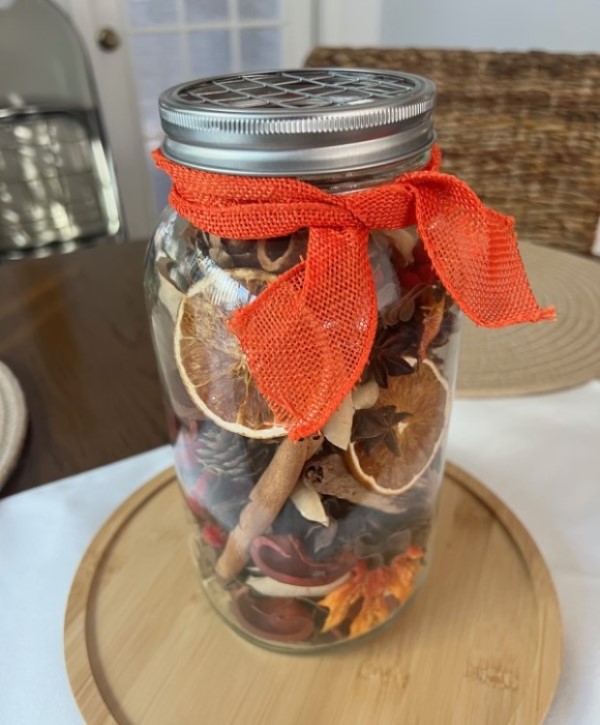
I wanted a fall fragrance for my first jar, using a mix of cinnamon, citrus, and anise. For a splash of color and texture I purchased some artificial fall leaves, dried orange slices, pine cones, and nuts.
Think about the mood or vibe you want to evoke as you start collecting your filler items.
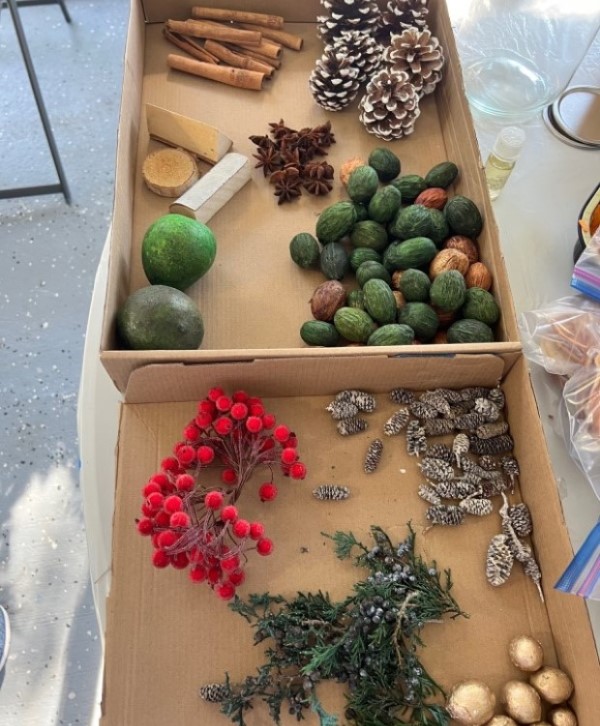
I laid out all the items I wanted to use, from the scented to the visually interesting. Pine cones and nuts work well as a starter base for the bottom. Even some interesting spheres and shapes help fill the jar.
In addition to the scent, you also want to create arrangements that are visually appealing!
It takes a bit of time and patience to fill a jar. There are some things that you'll want to keep visible and near the glass, while others serve better as central supports or fillers.
And here we have the finished fall fragrance jar, topped off with a colorful bow. The grid cap can be plainly seen in this view.
Viewing the jar from another angle... a more visible display of the berries, nuts and cinnamon sticks.
Okay, time to lean into more of a Christmas vide.
I wanted my next jar to have the aroma of evergreens, woods, and hints of cinnamon and anise.
Again, I started by organizing which items I wanted to feature. Included are some live sprigs of evergreen and fragrant pieces of wood.
I used seed pods and nuts primarily to fill the bottom base.
Then, with the base in place, pine cones and excess items will be used to fill up that center and they will hold the more decorative pieces firmley against the glass.
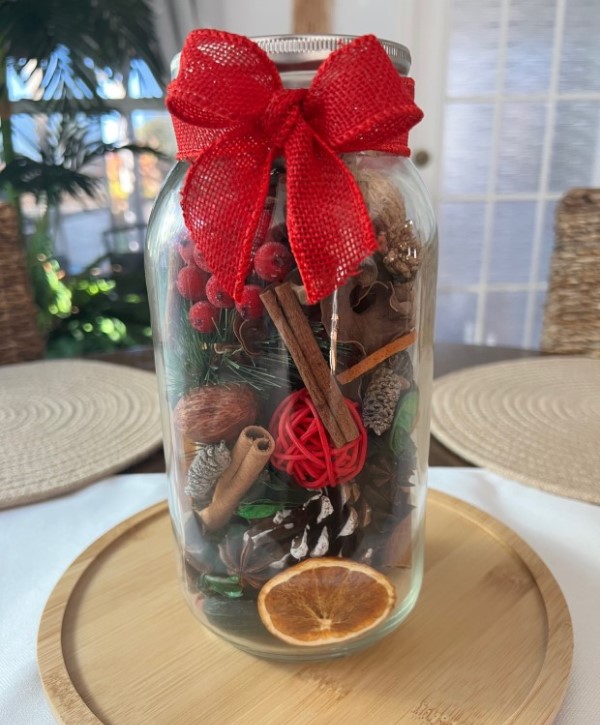
Christmas visuals included red berries, frosted pine cones, and some gold-painted balls. I added small pine cones, evergreen sprigs, nuts, and anise to fill in around the bigger, main pieces (alternating layers).
Lots of visual interest going on and the fragrance is amazing. The final flourish is the red bow.
Photo shoot from the top shows the gridded lid.
IMPORTANT: Fill your jar fairly close to the top so your arrangement doesn't move around too much.
And don't forget to save that solid cap! Use it to seal up the jar whenever you store it away.
This is my 2nd version of the Christmas jar - with some new accents. Additional pine needles and walnuts and a few playful shapes.
And of course, keeping that big red bow.
More variations of the aroma jars. They made great gifts for visitors and neighbors during the holiday season.
Now that you’ve seen how it comes together, gather your supplies and give it a try!
Below are Amazon links to an assortment of materials that I used in this project. Shopping through them may earn me a small commission, but it doesn’t change your price — just makes finding materials simpler!
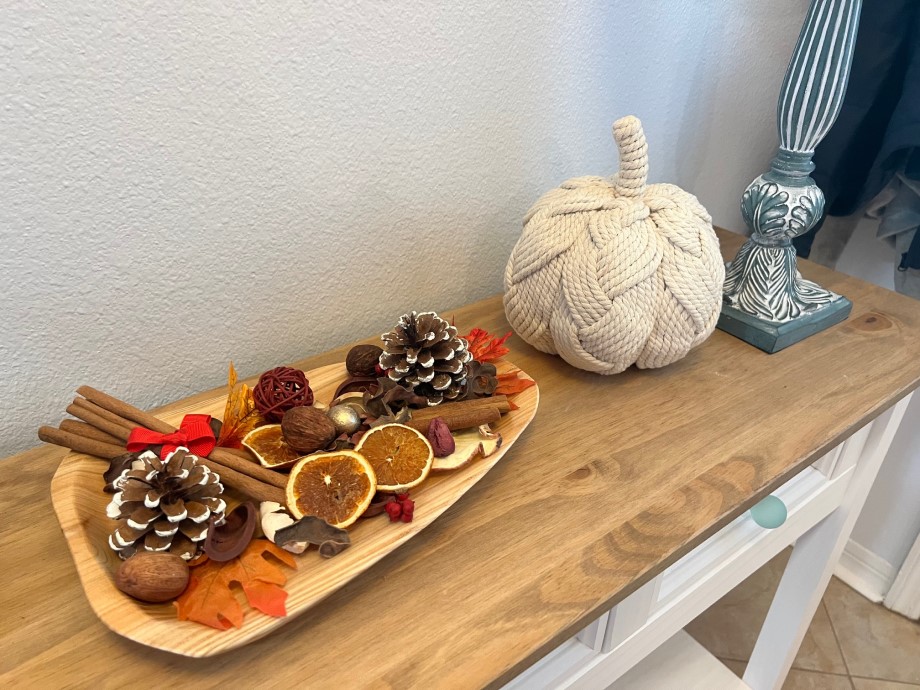
If you don't want to do jars, there are lots of other ways to display and add the wonderful aroma to your home. In my front entrance way I just used a wooden tray or bowl.