

Come closer
- if you dare -
to this year’s
front-yard fright!
My 2025 Well Project
I found an Infinity Well example on Pinterest that intrigued me and I decided it could be a great addition to my annual Halloween display. In planning the project, I knew I wanted to make it taller and swap the wooden ladder for metal-looking rungs. I built the inside of the well first to test the effect, which turned out impressive—the illusion of endless depth is striking when viewed from above and actually draws you in.
From the beginning...
First, the can. I decided to go big for more height, so it appeared more like looking in an
actual well.
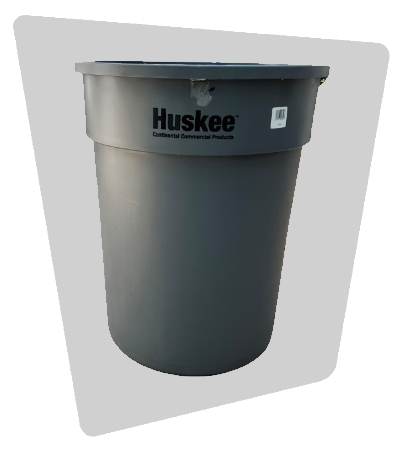
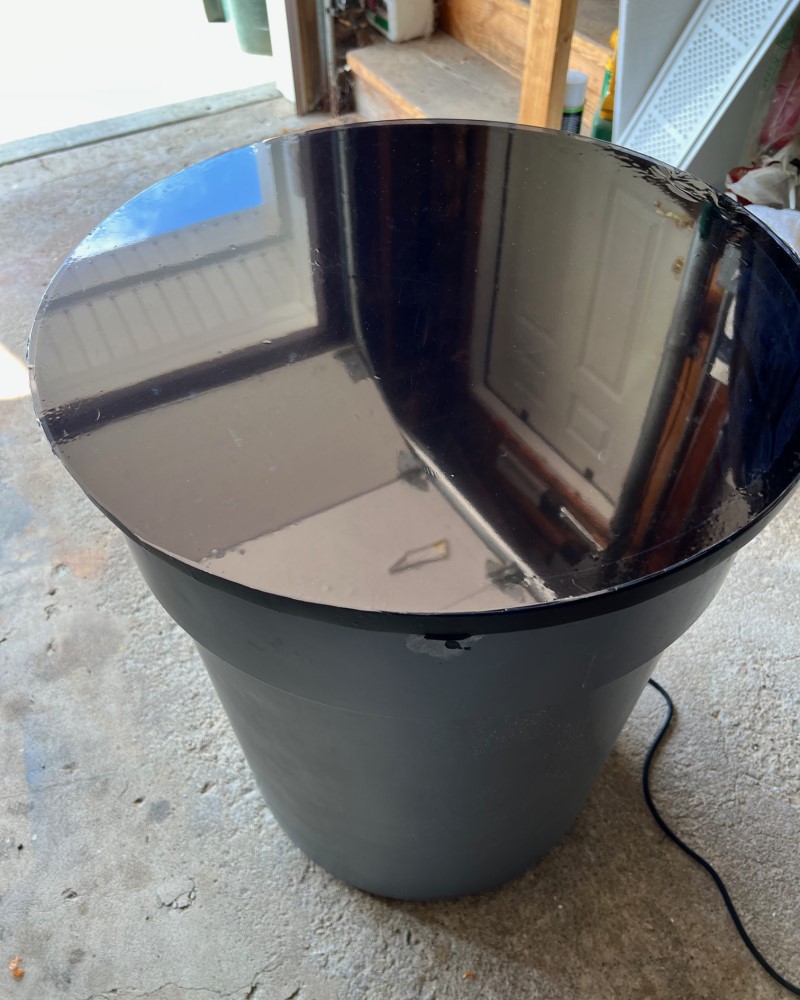
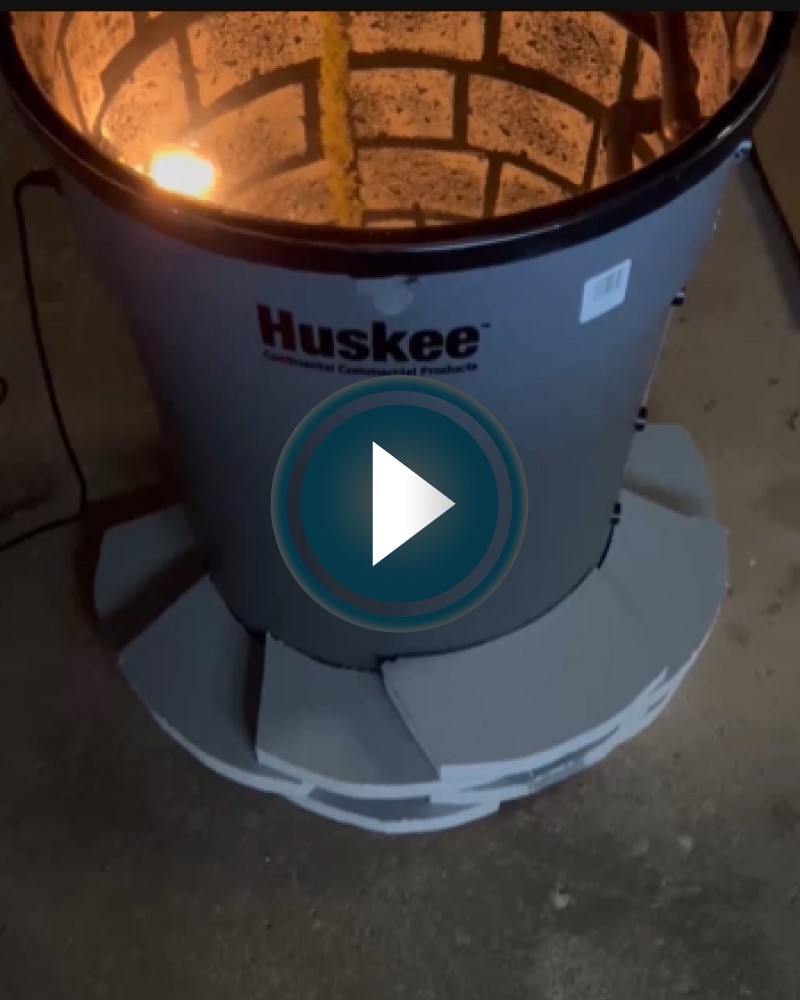
I ordered a Huskee garbage can (with the least tapering, or indented areas) from an online restaurant supply place. I couldn’t find one in black, so I spray-painted the inside - the outside would be covered by the well wall.
BRINGING IT TOGETHER
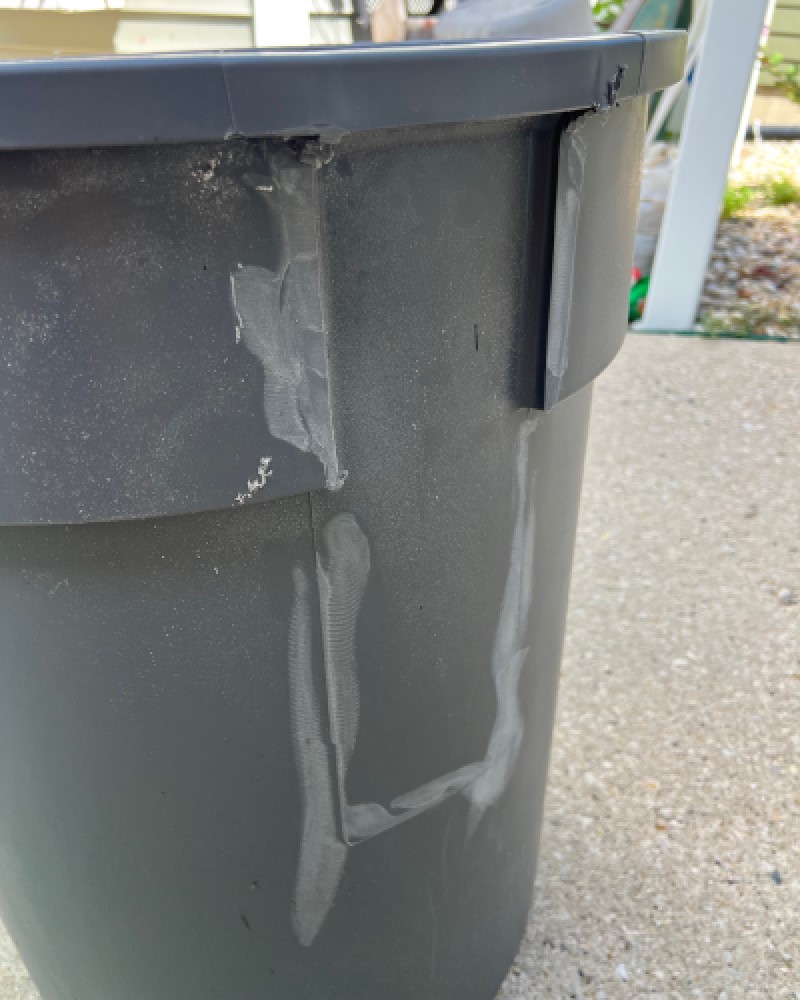
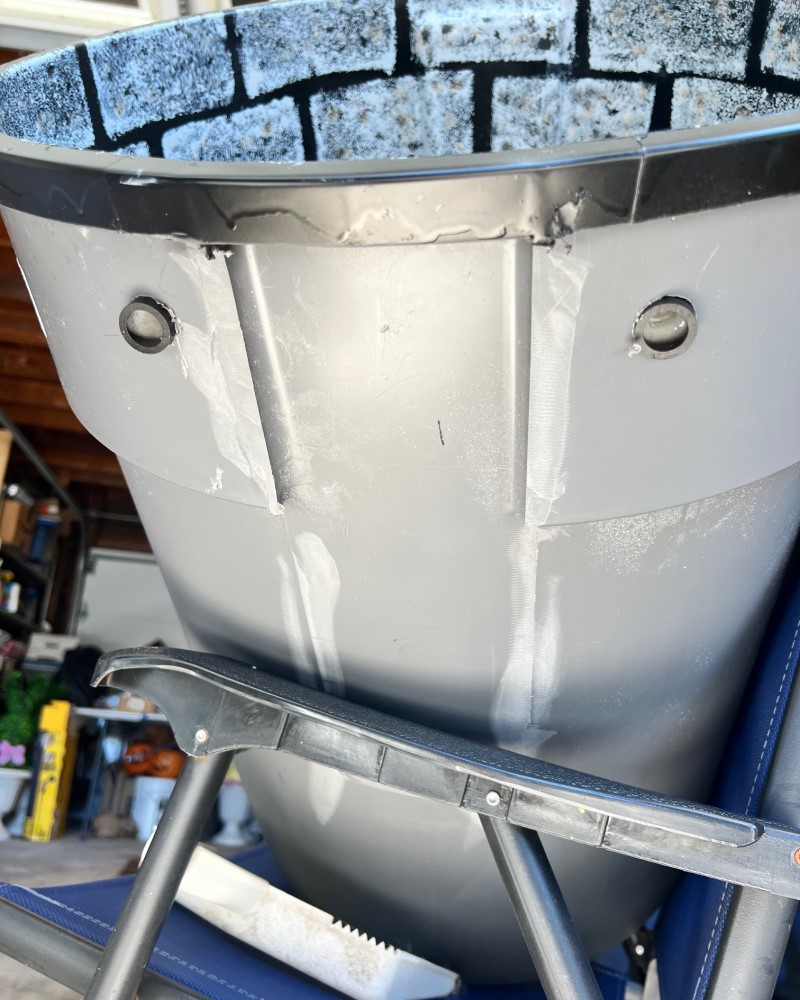
First thing was to Dremel (brand of high speed rotary tool) off the handles on the can, they would just be in the way.
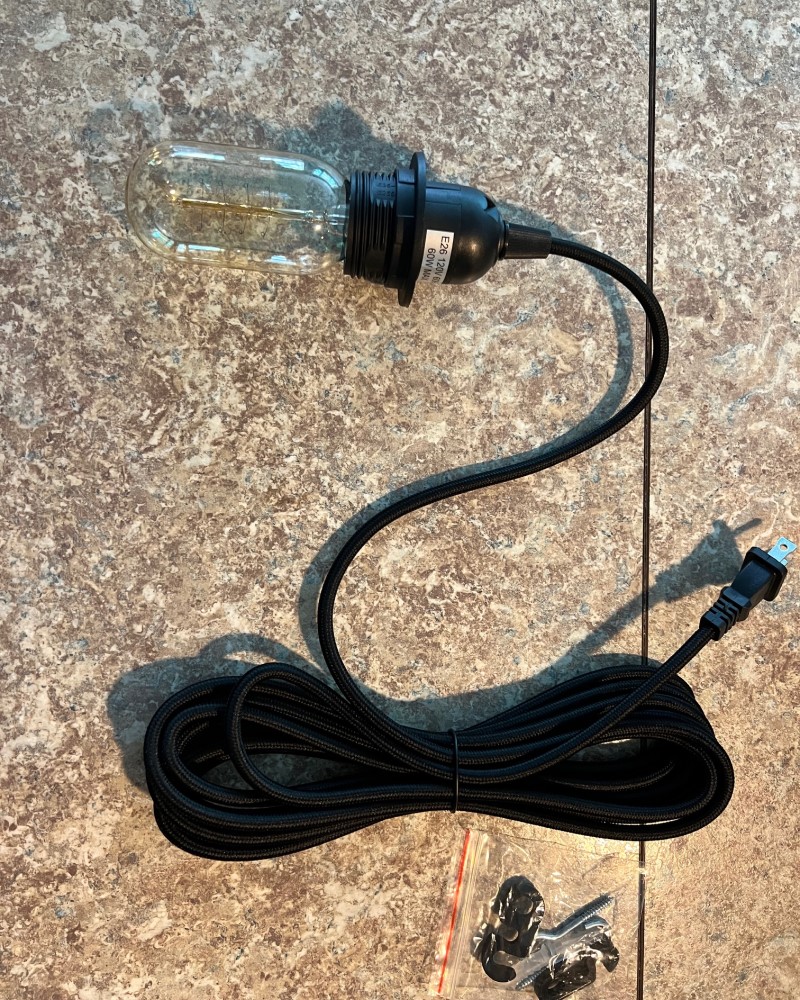
I ordered a light fixture to insert into the can. You are going to want to get one that can be inserted through a cut hole and tightened from the inside. I also ordered some great Vintage Edison bulbs, with a great effect. Both of these came from Amazon.
I cut drainage holes in the bottom of the can, since this will not be water-tight, and I don’t want water collecting in it.

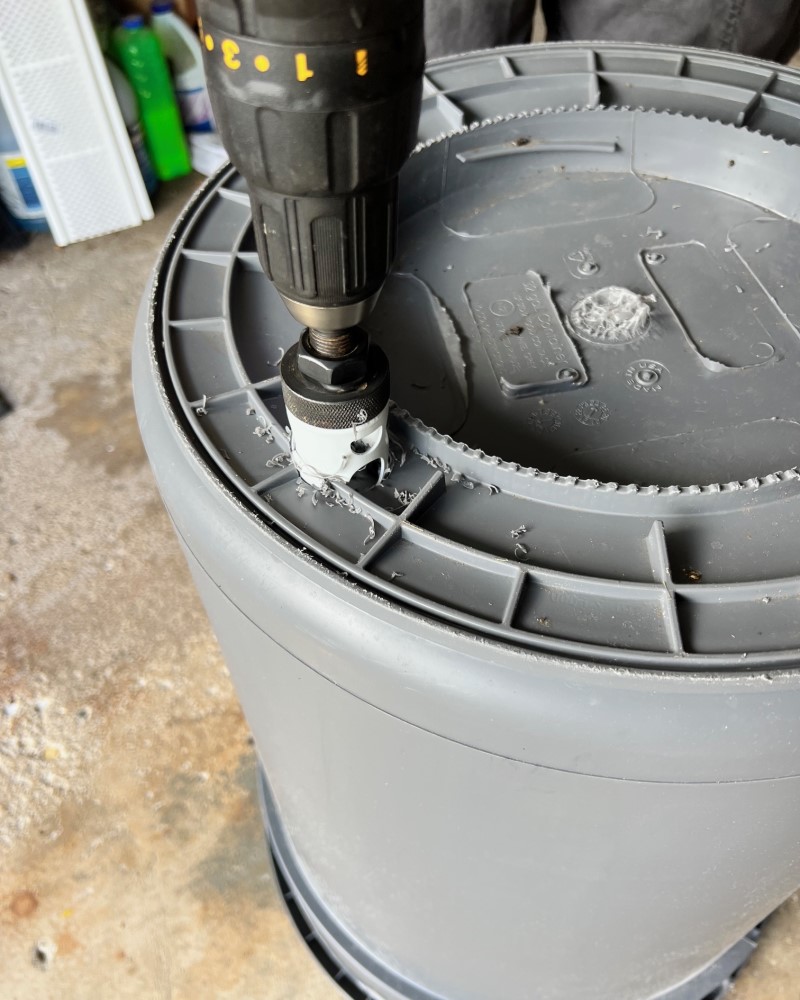
Then, a hole was drilled in the side of the can for the light fixture. I placed my hole just above the halfway mark and a little closer to the top.

You will want the hole just a little bigger than the light fixture, so you can easily push it through.
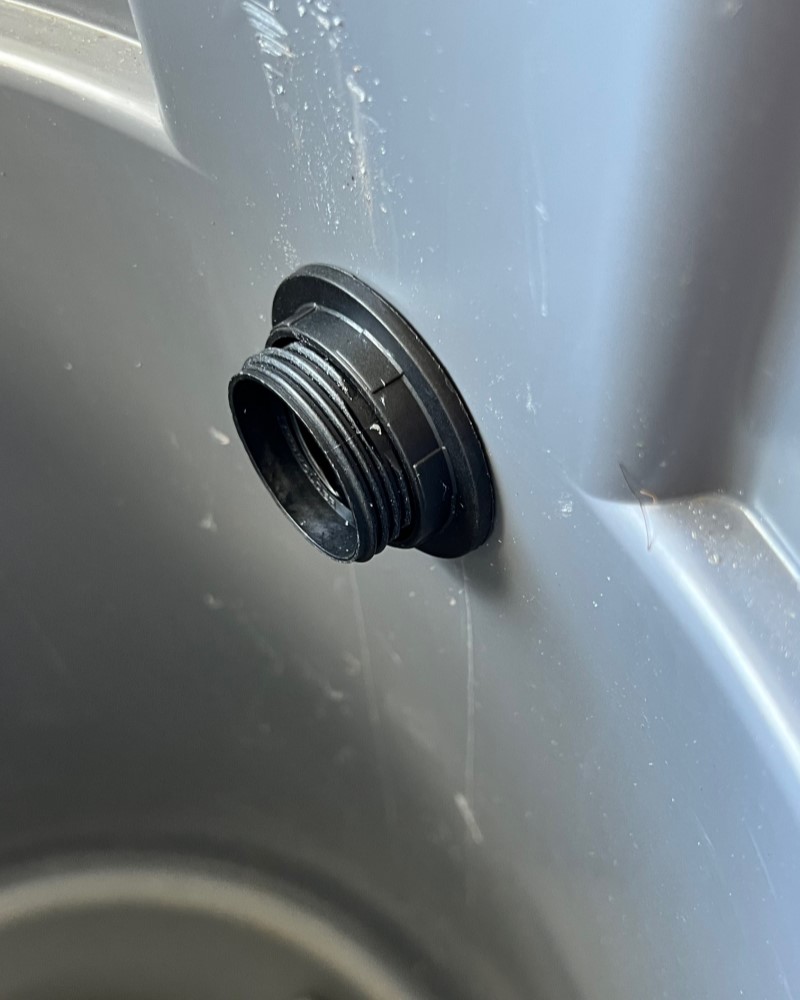
Once the light fixture fits through, you screw on the inside piece to secure it tightly.
The biggest expense for this project was the mirror. I needed to get a round mirror that fit exactly in the bottom of the can. My can was 18” at the bottom, and I found the perfect one on Amazon for $38.
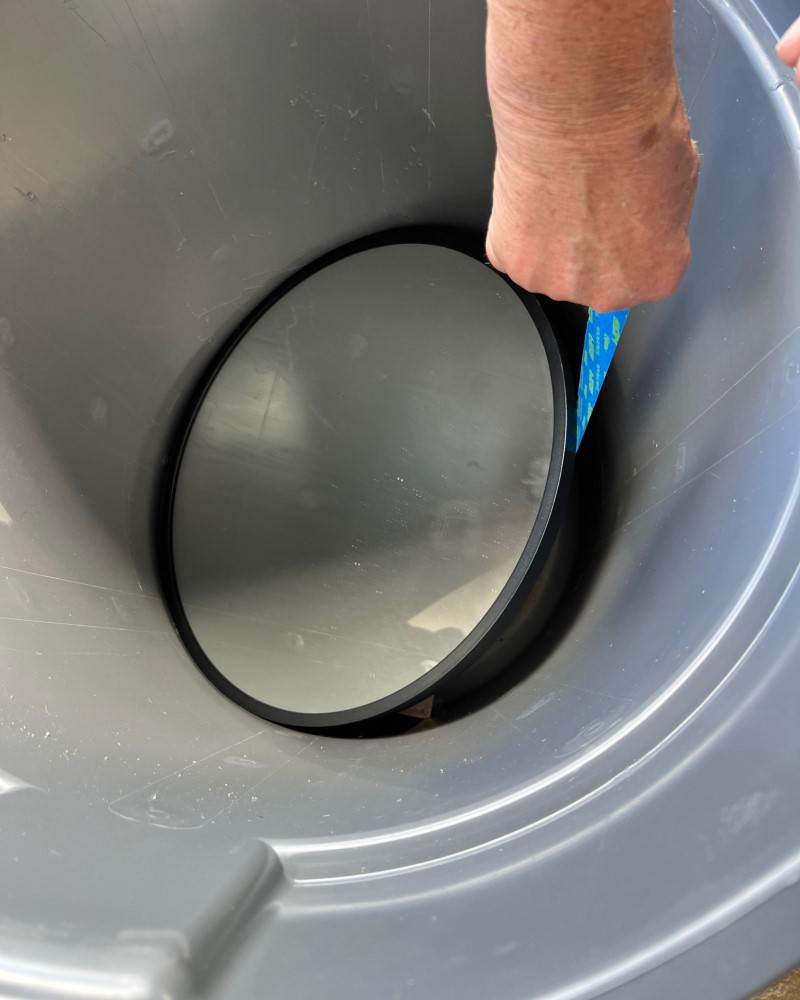
I secured a painters' tape strap to the back of it, because it fit so well at the bottom, I couldn’t get it back out. While working on the project, I could use the tape to help lift it up to grab.
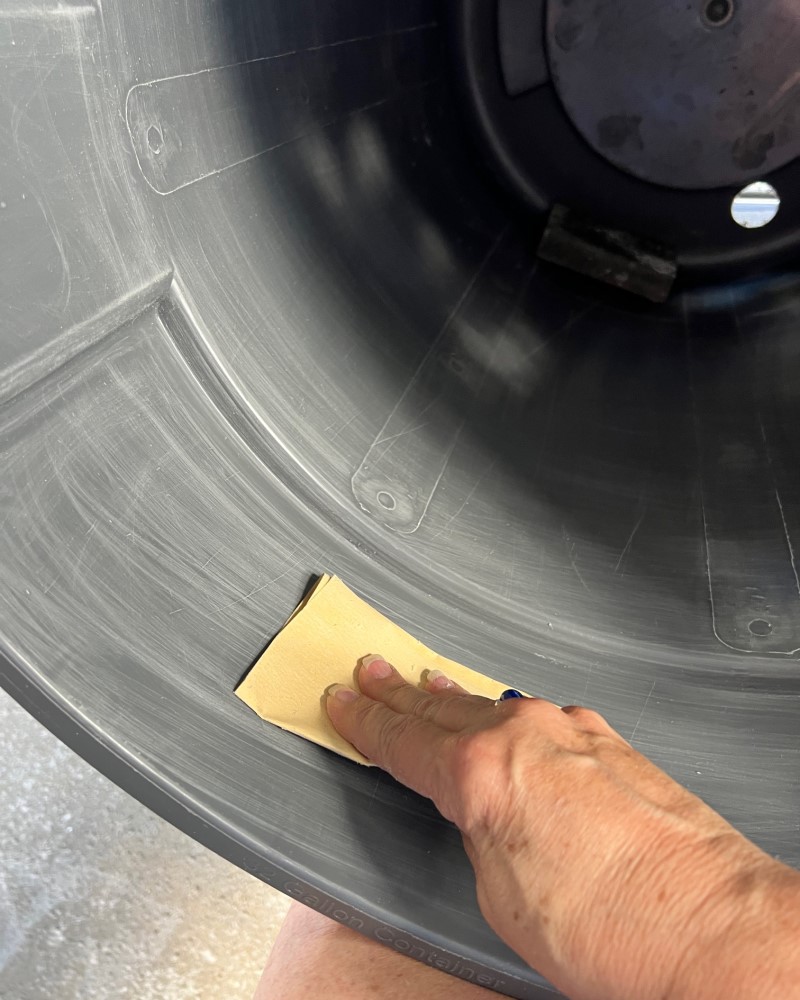
Once I knew the mirror would work, I removed the mirror and lighting and started to prep the inside of the can for painting it black. I did this by using sandpaper and roughing up the inside. This step isn’t necessary if you find yourself a black can.
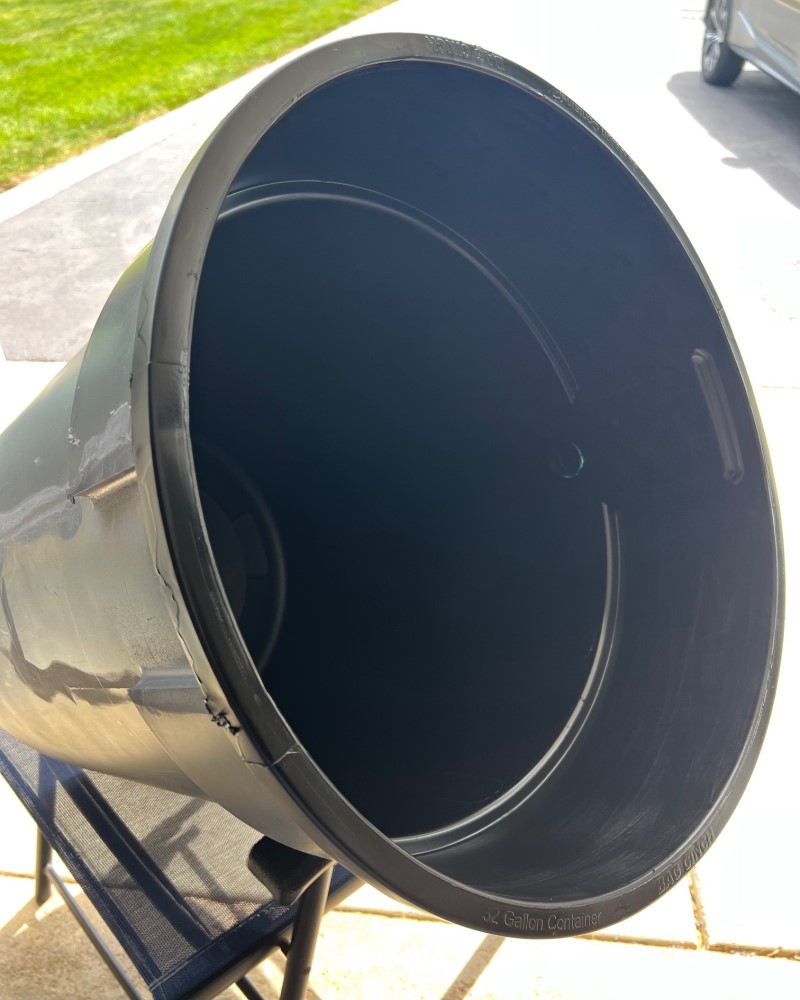
Black spray paint inside did the trick just fine. I did, however, have to do this in several sections to complete, since the paint fumes would get stuck in the can for a while. I finally placed the can on a chair so the bottom drainage holes provided some air flow.
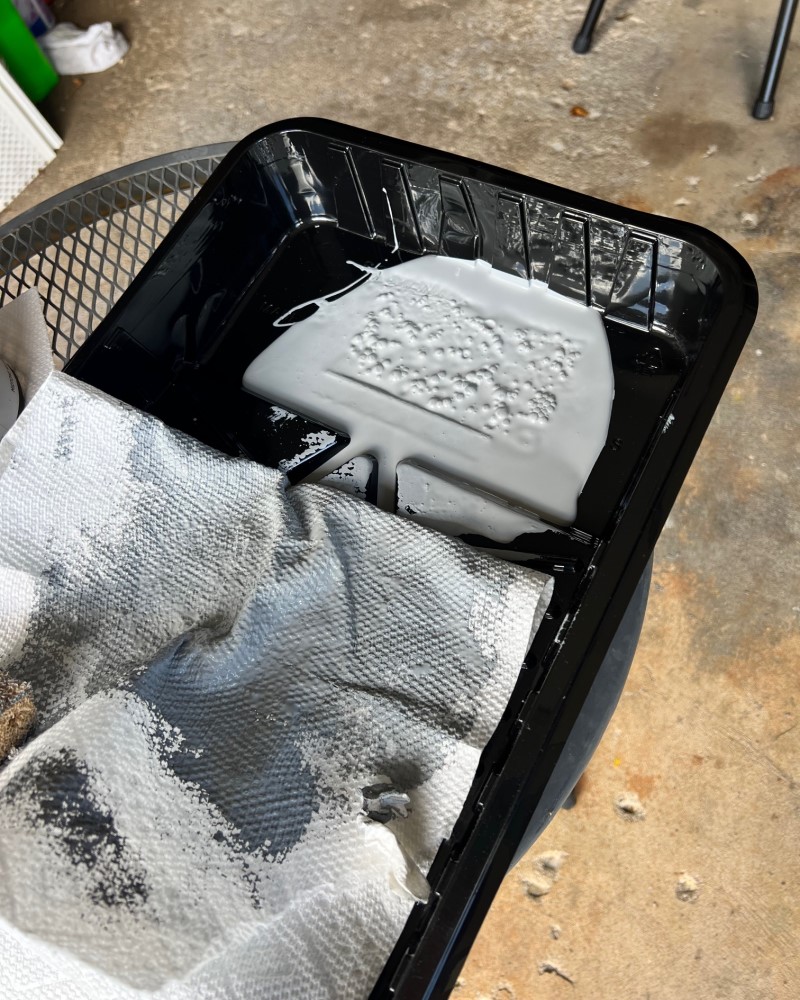
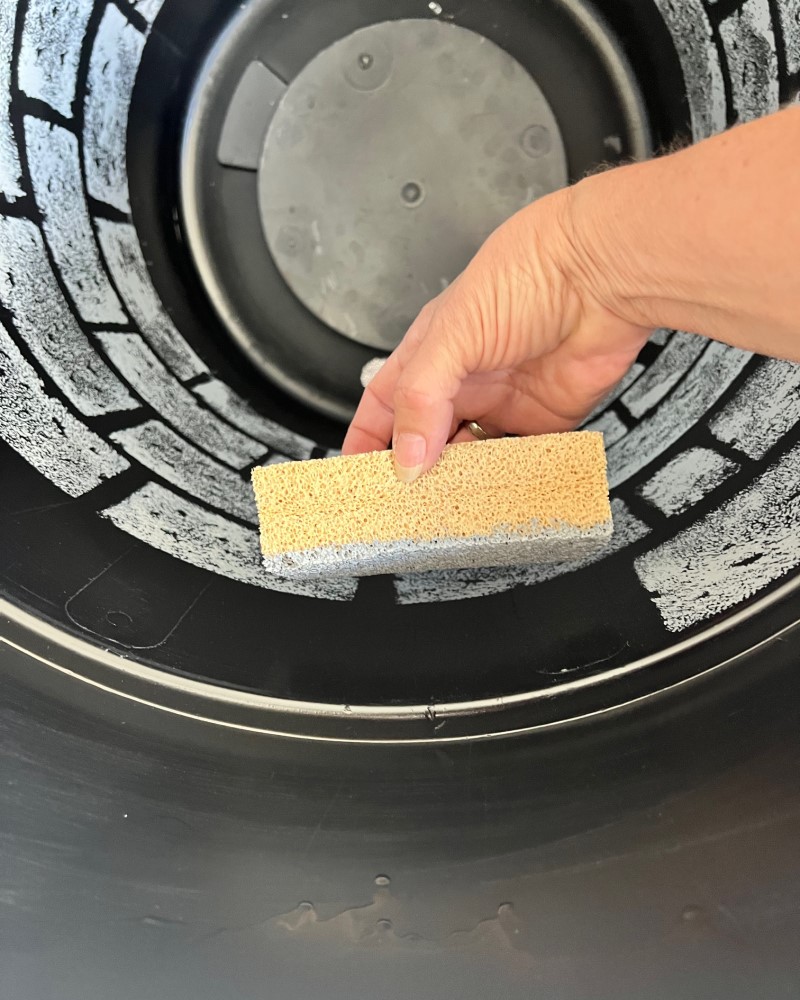
The next task was to paint that brickwork in the can. This was done with gray paint from the hardware store and a large porous sponge. I used a paint tray for the paint, but had paper towels laid out to dab off some of the paint on the sponge.
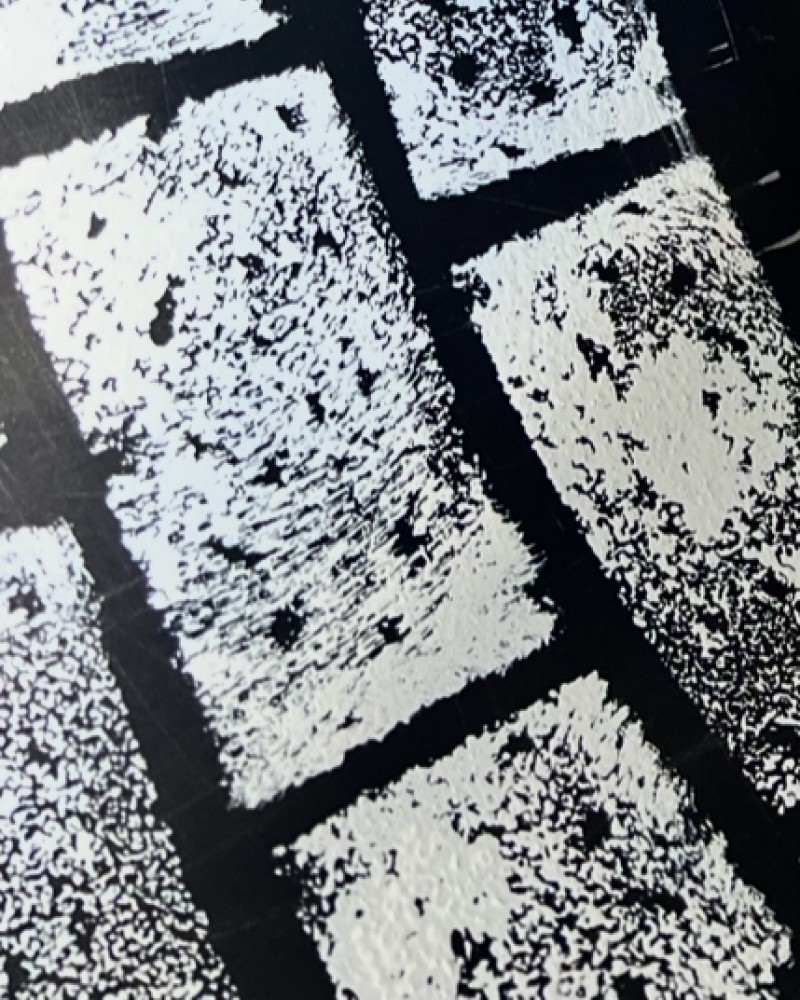
You want the sponge print to leave some less solid patches and holes in the brick print. If you have the sponge too soaked with paint, it will just look like a solid rectangle.
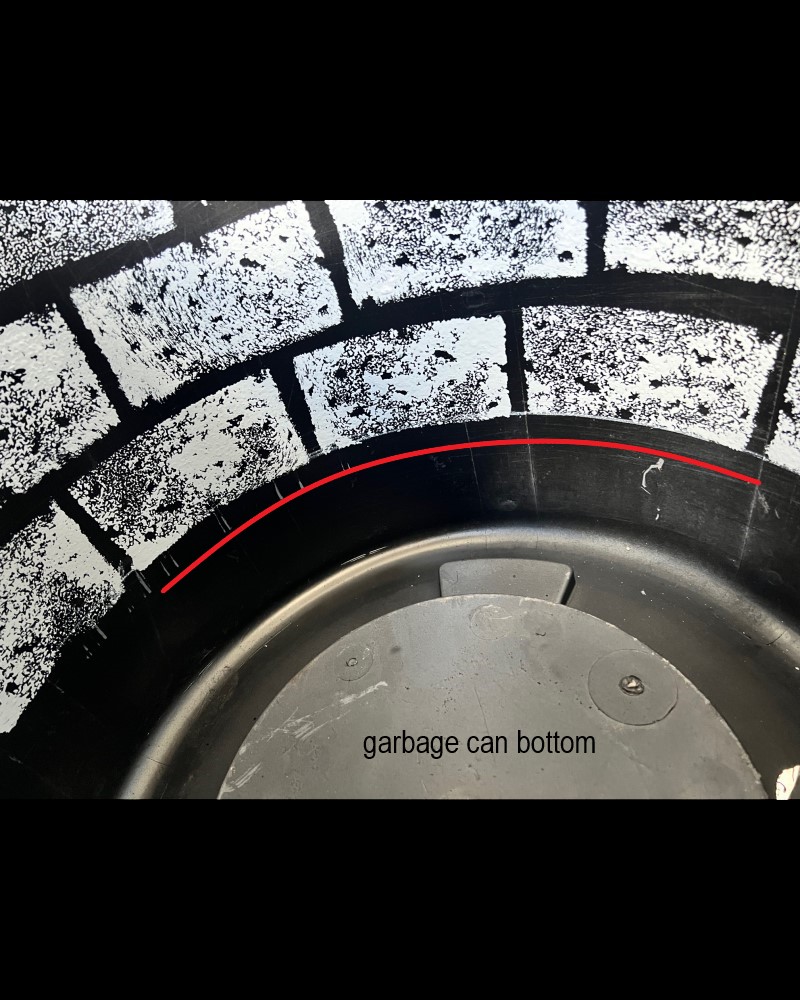
Before starting to paint the bricks, I wanted to mark-off exactly where the mirror would be lying as my first line of bricks needed to start exactly there. My mirror was actually raised up from the bottom by 3 clay bricks (put in the bottom of the well to give the well some weight).
Then I started from the bottom mark in the can and worked my way up with the brick paint pattern. Be sure you leave a little spacing between each line and each brick.

As you can see, my can did have a slightly wider top portion, so I calculated how many bricks I needed so my last one was over that little lip. You can also see one or two places where I also had to fill with a smaller brick to complete the circle. That’s all fine, old wells aren’t perfect.

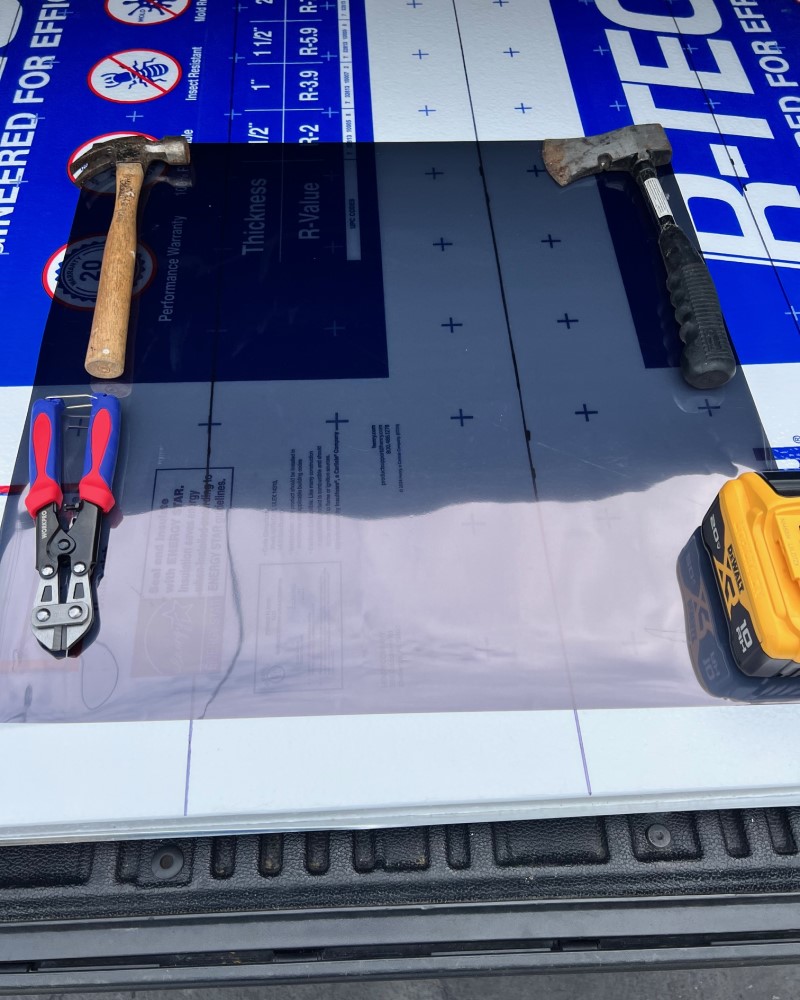
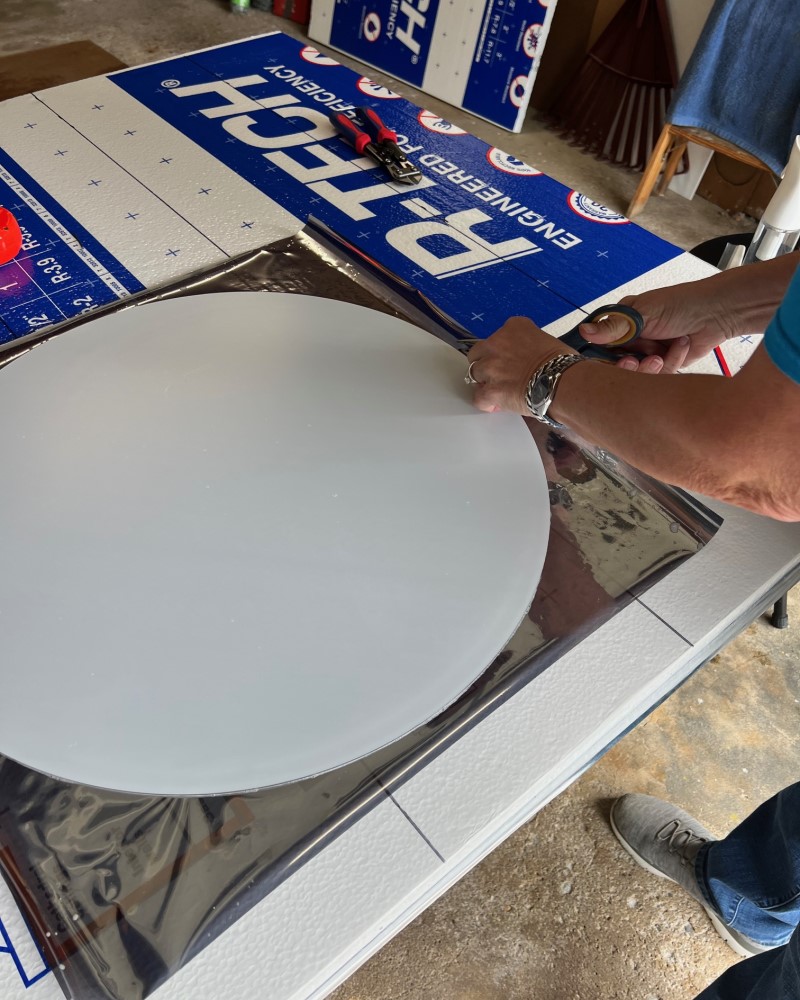
Next, I needed a round piece of plexiglass or acrylic to fit over the top of the can. I wasn’t going to mess with trying to cut one myself and sand down the sides, so I did find the right size on Amazon. The top of my can was 22 inches.
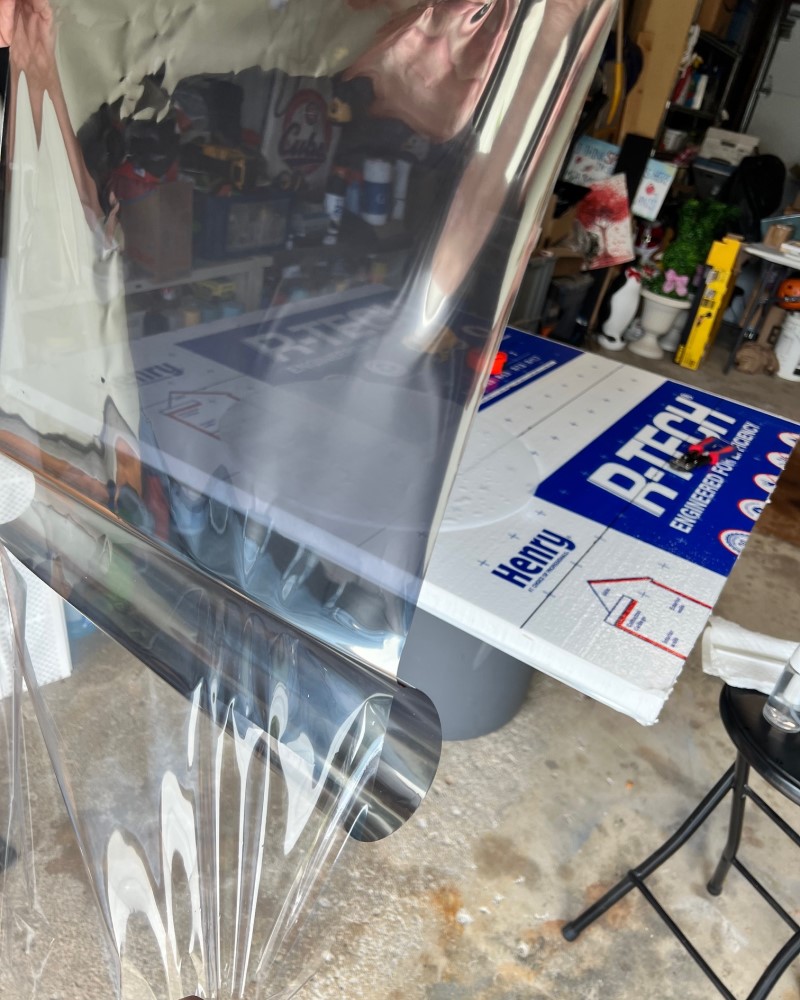
To use on the plexiglass top, I bought one-way mirrored window film - like the kind on car windows so you can see out, but not in. This is necessary for the full effect and to prevent you from seeing yourself in the well when you look down into it.
You can get this one-way mirrored window film from Amazon as well. I cut it bigger than the round plexiglass and gave it 24 hrs, weighted down, to take the curl out of it.
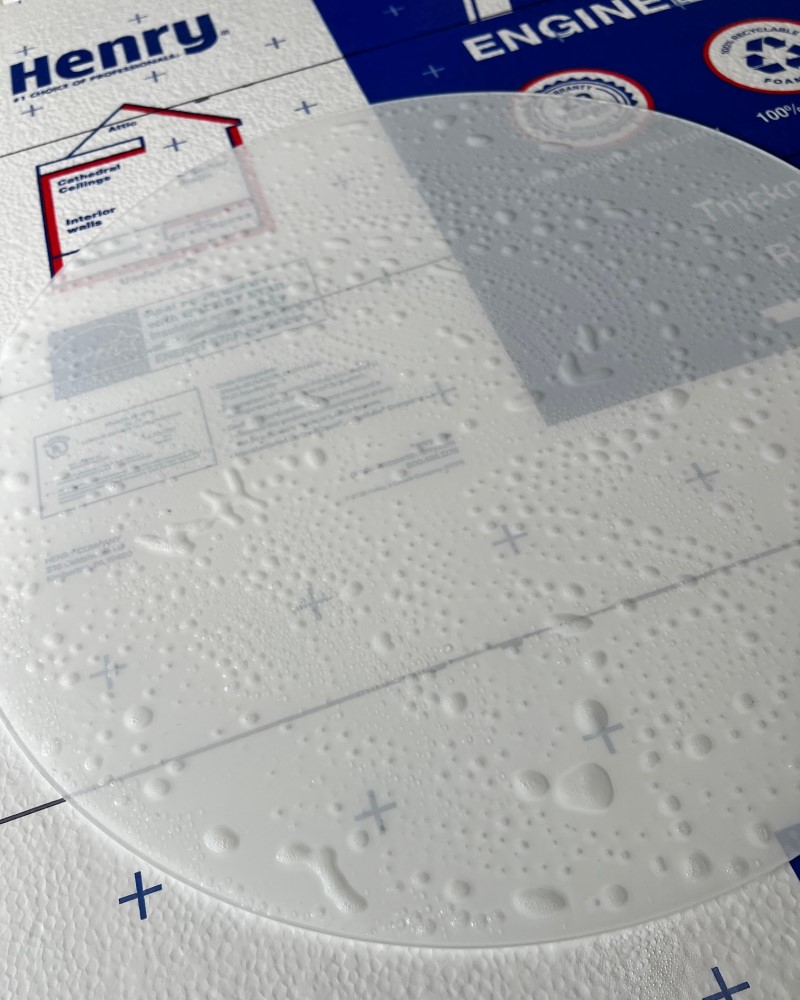
Then, following the instructions provided, you use soapy water all over the plexiglass.
Once thoroughly wet, I placed it down on the mirrored side of the film. It adheres pretty well with just the water. You will need to turn it over and use a squeegee, or something like it, to smooth it all out and push the excess water off the edges. Once it was smooth and the excess water cleaned up, I cut the excess film so it fit exactly to the plexiglass..
Now I place it on top of the can with the mirror side reflecting downward and the dark shaded side on the top. Without it being dark and the well light not on, you shouldn’t be able to see anything butblack. I won’t affix the top to the can until everything is completed and located outside. Then I just used two sided Gorilla Tape to affix the plexiglass to the top of the can.
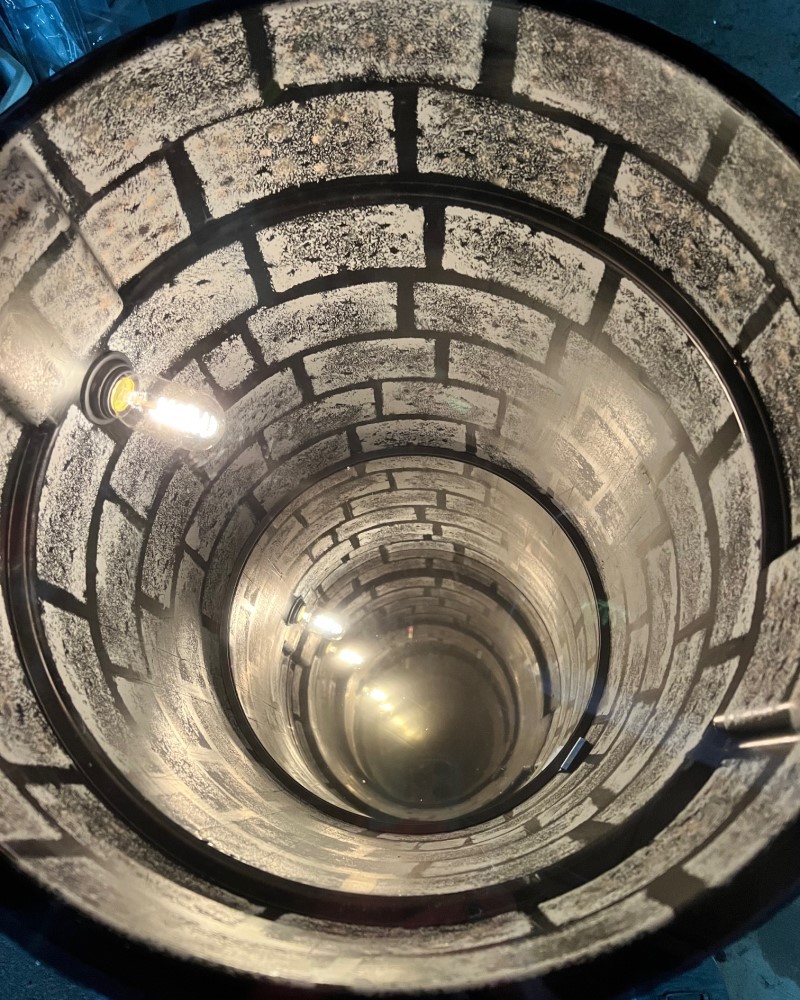
Now was the moment of truth. I put the bricks for weight and mirror back in the bottom of the can. Inserted the light fixture back into the side of the can. Then placed the plexiglass on top. Before I went any further with this project, I wanted to be sure it was achieving the effect I was looking for. With the inside of my garage dark, I plugged in the light. WOW! It really works and has amazing depth!
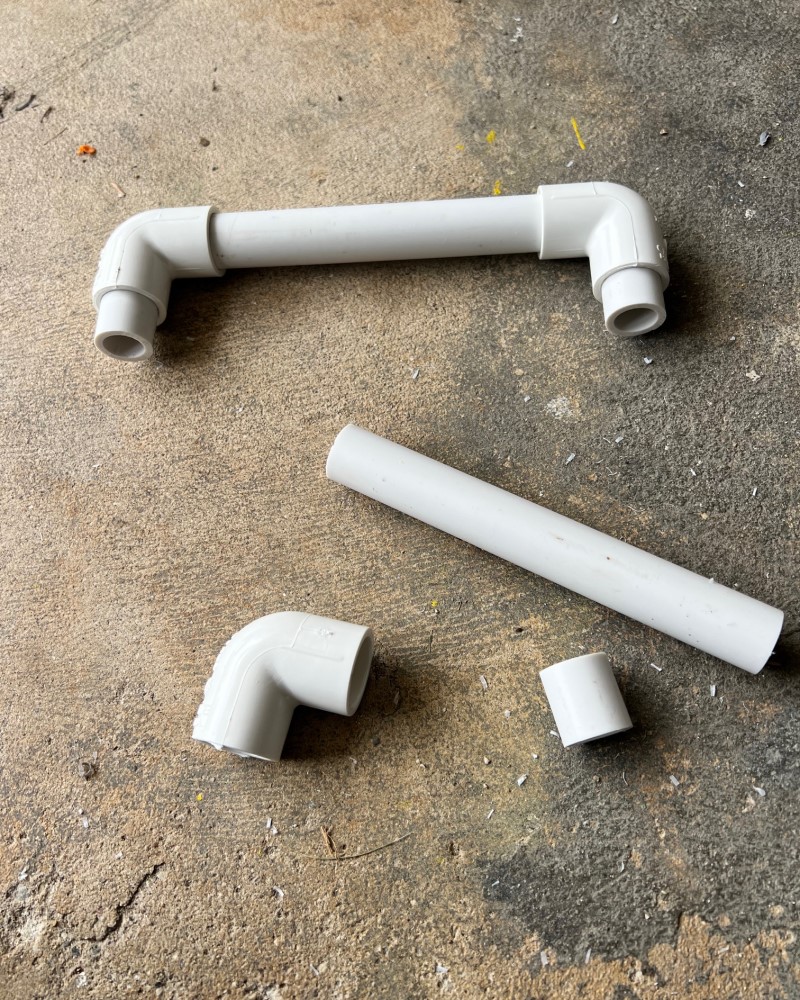
I was excited to go create the ladder now. The well I previously saw used a wooden ladder, but I really wanted to do embedded rungs. I used small PVC pipe and elbows to do this.
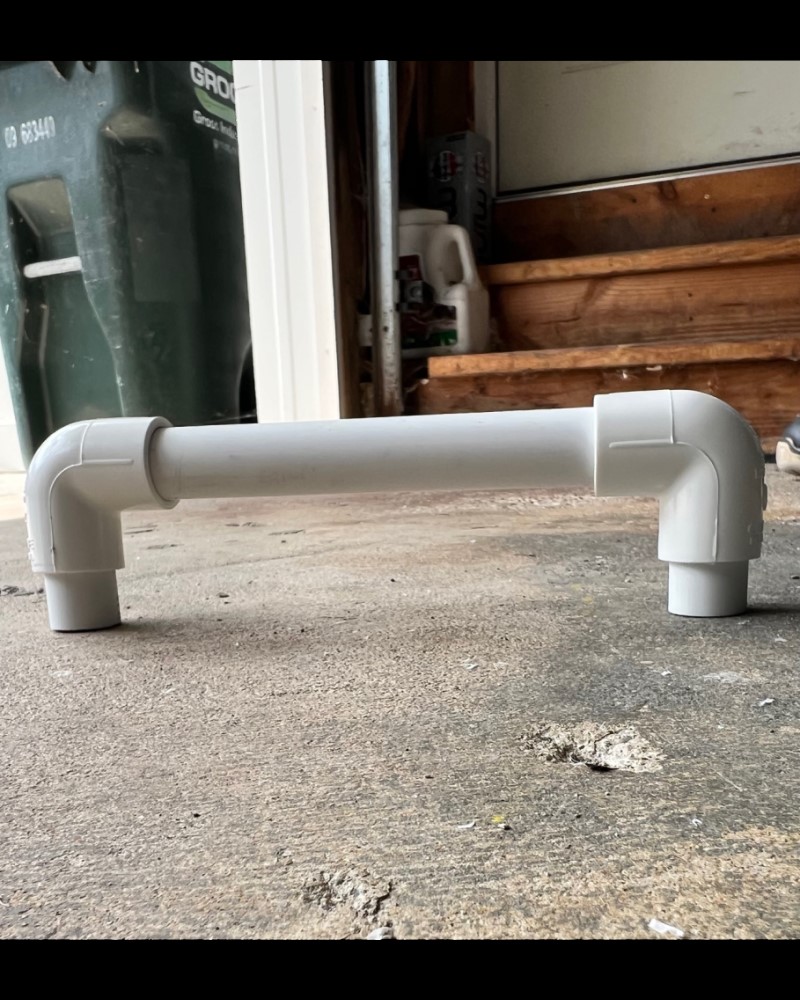
I did add short-cut pieces of PVC to the ends of the elbows. These are the parts that will be pushed through the holes made in the can and stop at the elbow. I bet you were wondering how I fastened them in the can, I was too at first.
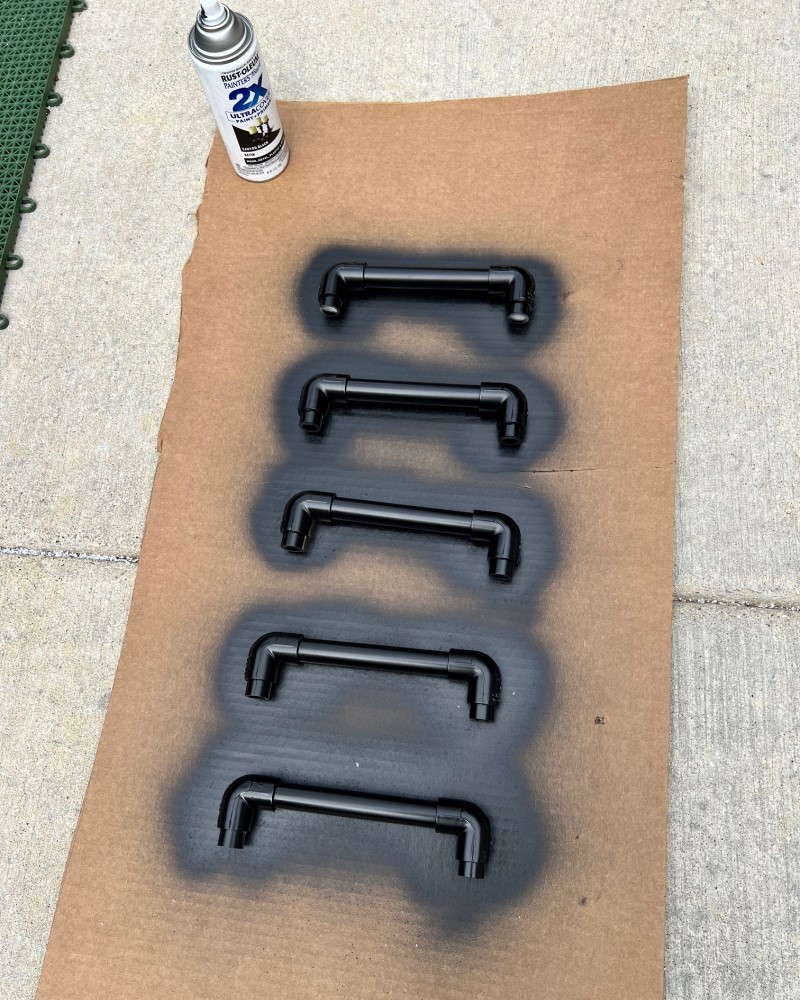
Once all painted black, they looked perfect!

Based on the width of the rungs, I drilled holes to fit the diameter of the little pieces of PVC pipe I had sticking out of the elbow. BTW, I remove the mirror from the bottom every time I’m working on the inside of the can, especially drilling, so it doesn’t get full of dirt and debris.
Then pushed the first rung through from the inside out. They fit so snuggly, I didn’t even have to add any glue.
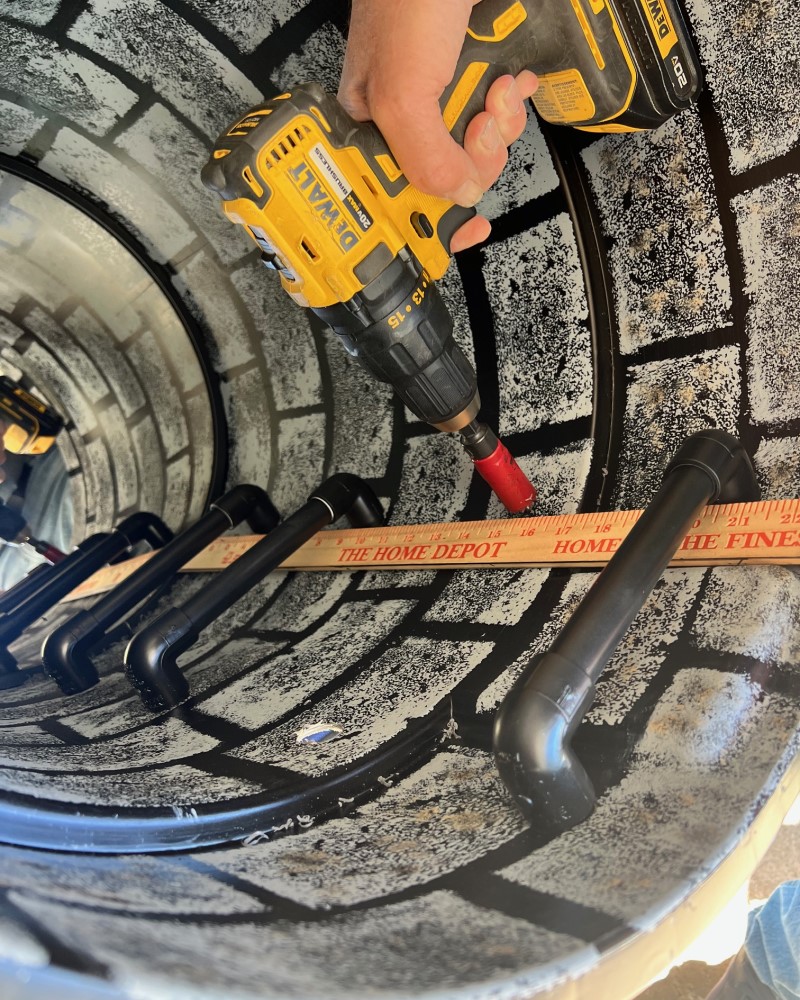
Now I just had to line them up to each other and space them out in the can for the rest of the holes.
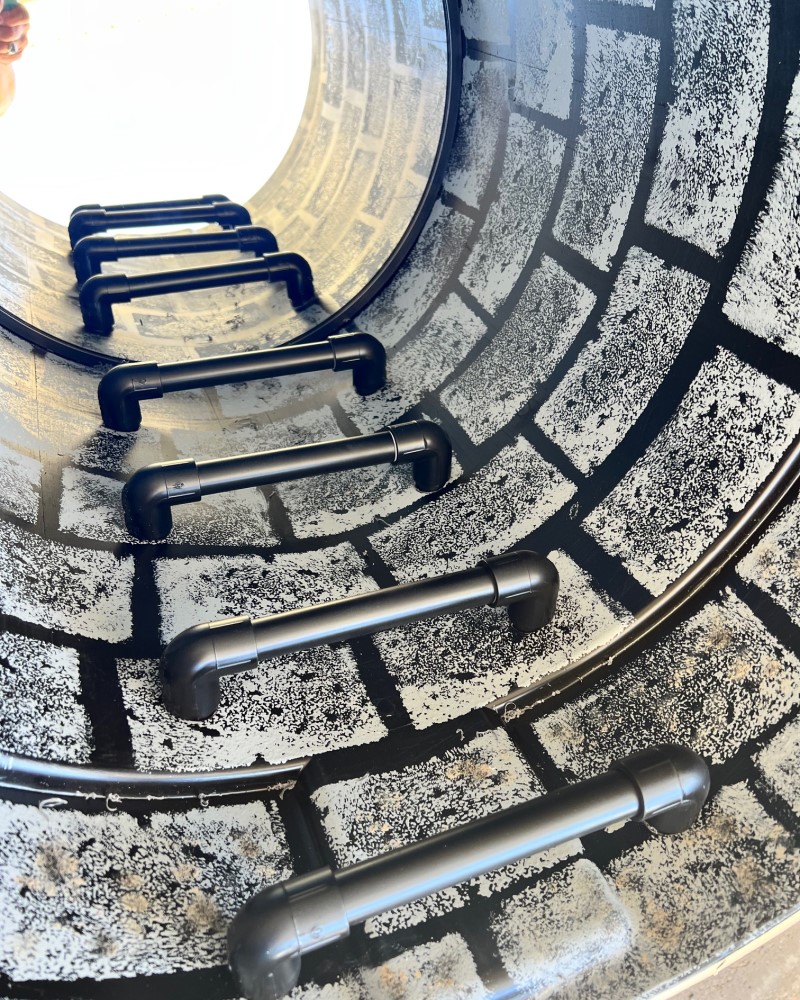
They look pretty great!
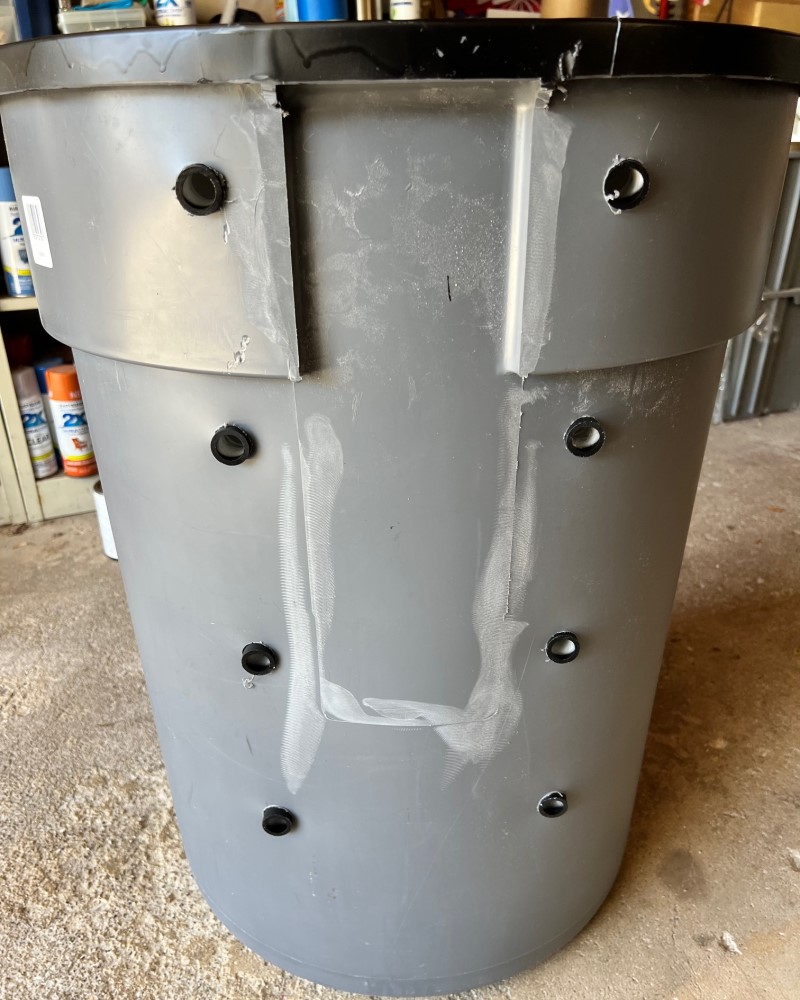
This is how the outside of the can looks. You won’t see any of this as the foam bricks for the well will be covering them.
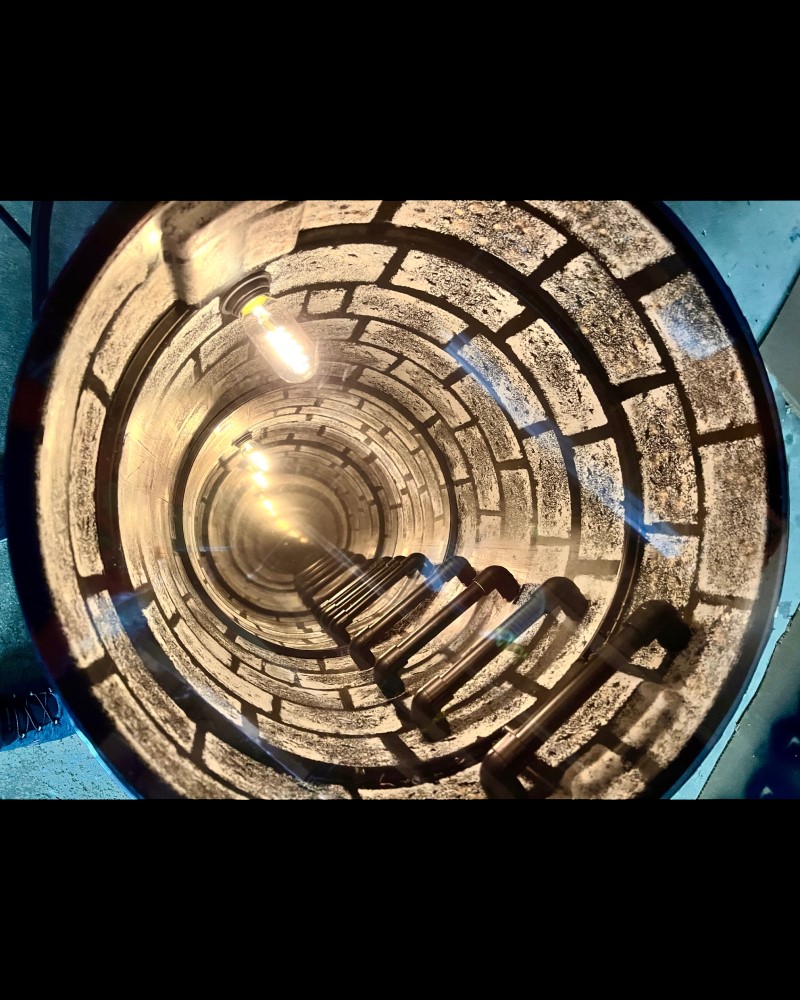
Now to put everything back in the can again to see how they look. With the light fixture in and the ladder rungs, you will need to slide that mirror in on its side to avoid them. Again, WOW! What a dramatic effect! The light bulb and ladder draw your view downward. I am so psyched now to get the rest of this completed.
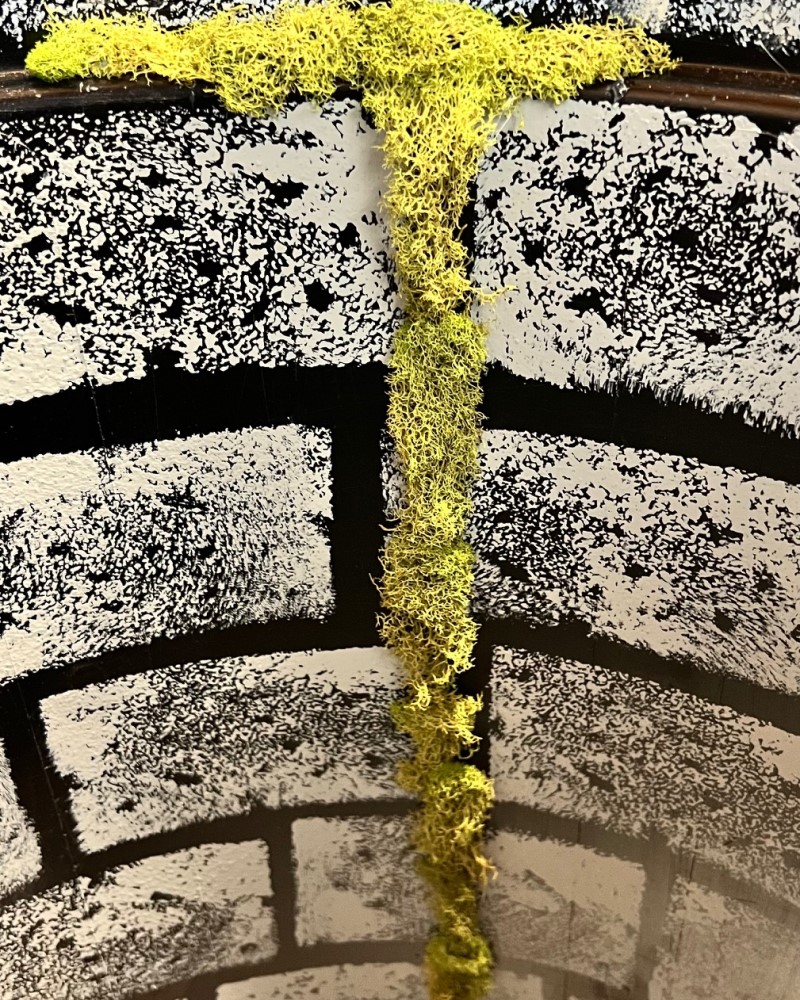
I decided to add one more element into the well. Wells are usually damp and dark, so moss made sense to me and I had some leftover moss I could use. The moss needed to visually continue downward like the light and the ladder, so I added one long strip of moss from the top of the can to the mirror.
Here is a little in-progress video of the interior. I did most of my work in my garage, so I could close the door and turn off lights. It needs to be dark to effectively see into the well.
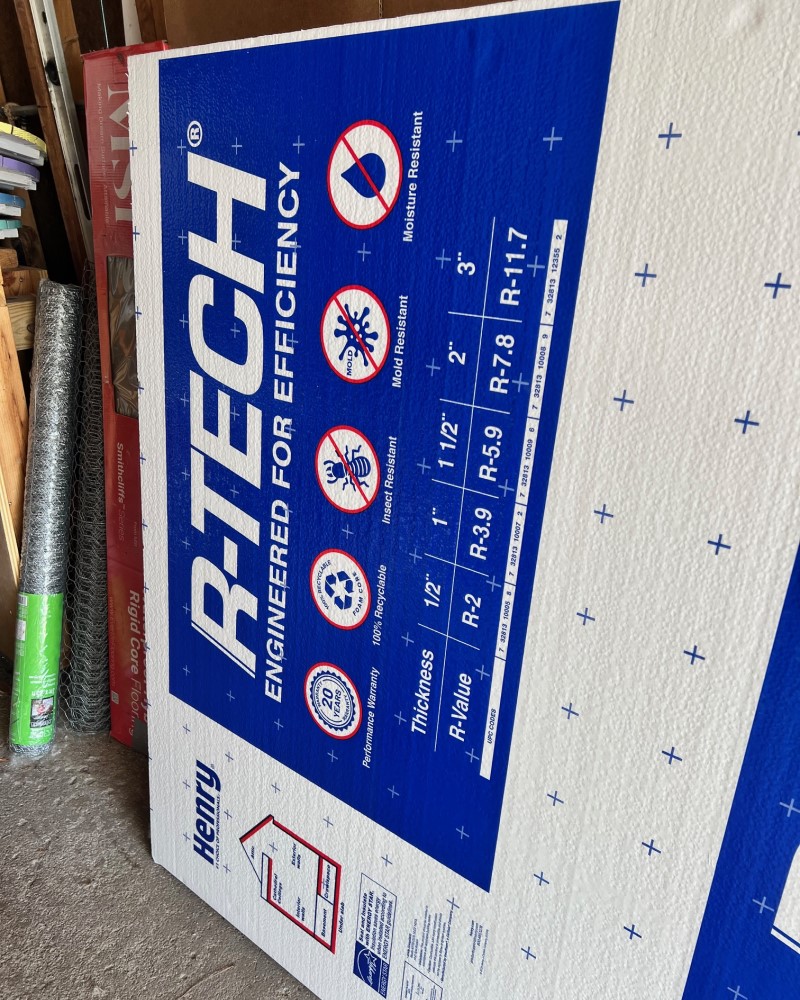
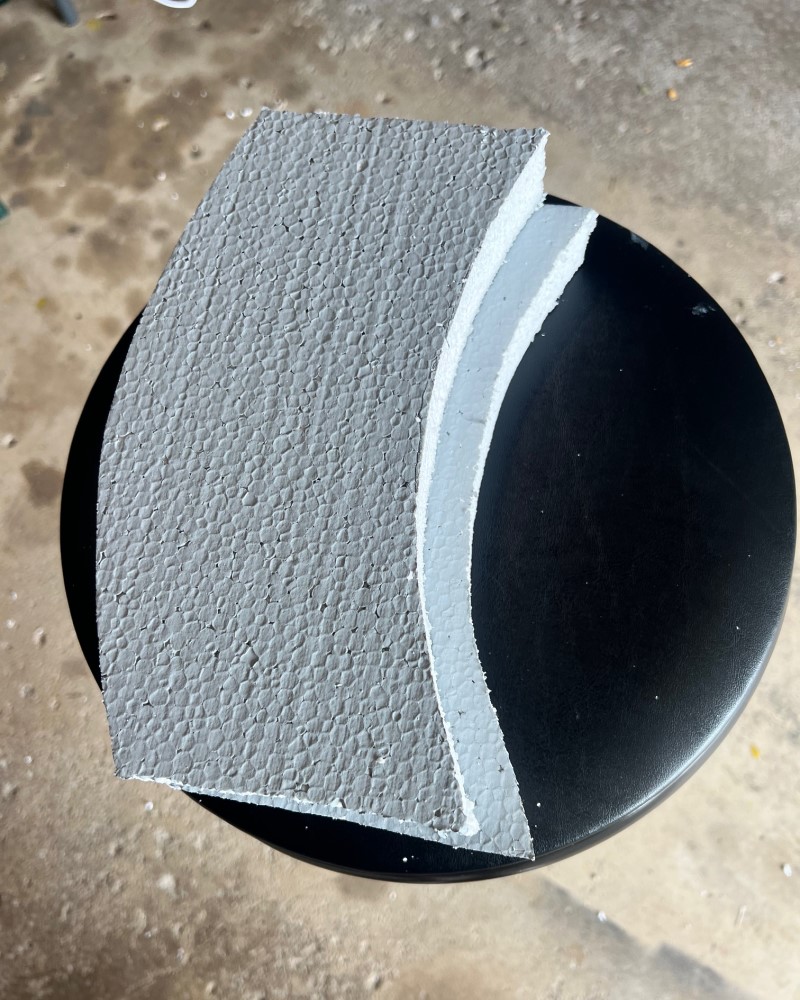
For the outer well, I used R-Tech insulation foam board to create the look of stones or bricks. I bought the foam board at Home Depot, and it was like $10 for an entire board. Since the garbage can is tall, I went with 1 ½ inch thick board.
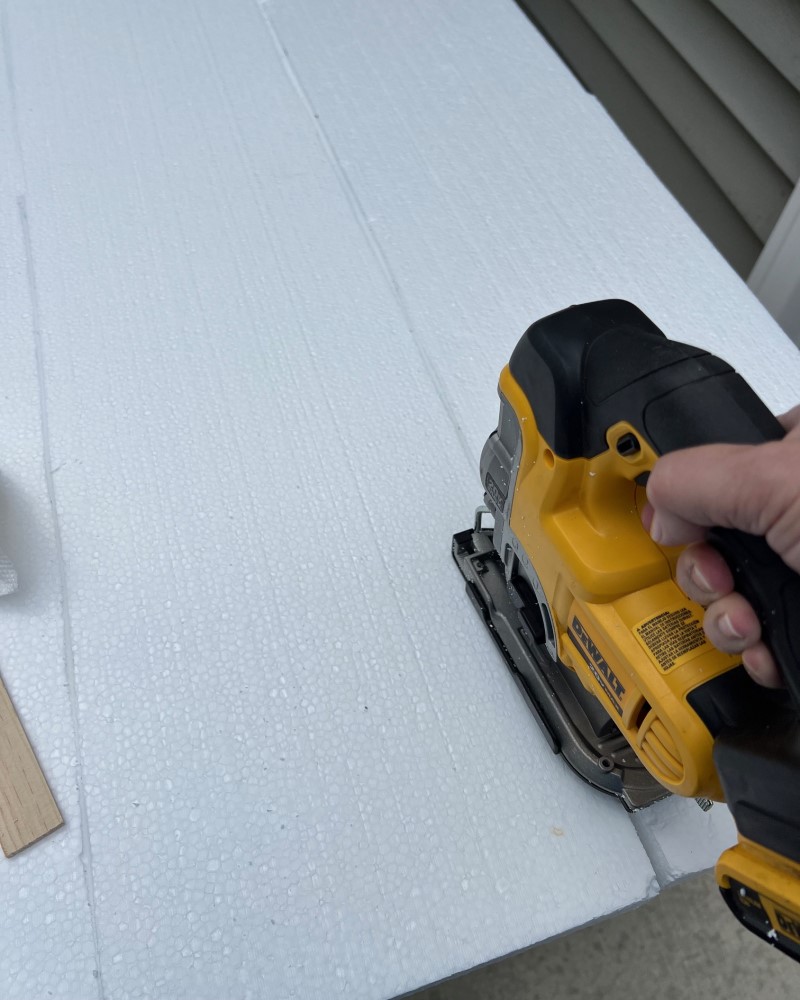
I cut the boards into 10” wide strips for my bricks. It's up to you if you leave the protective paper on or off when cutting. I tried it both ways, and it didn’t make much difference.

You will, however, need the protective paper off both sides when you paint them.

With the same gray paint I used for the bricks inside the can, I painted the 10” strips of foam with a paint roller on both sides.
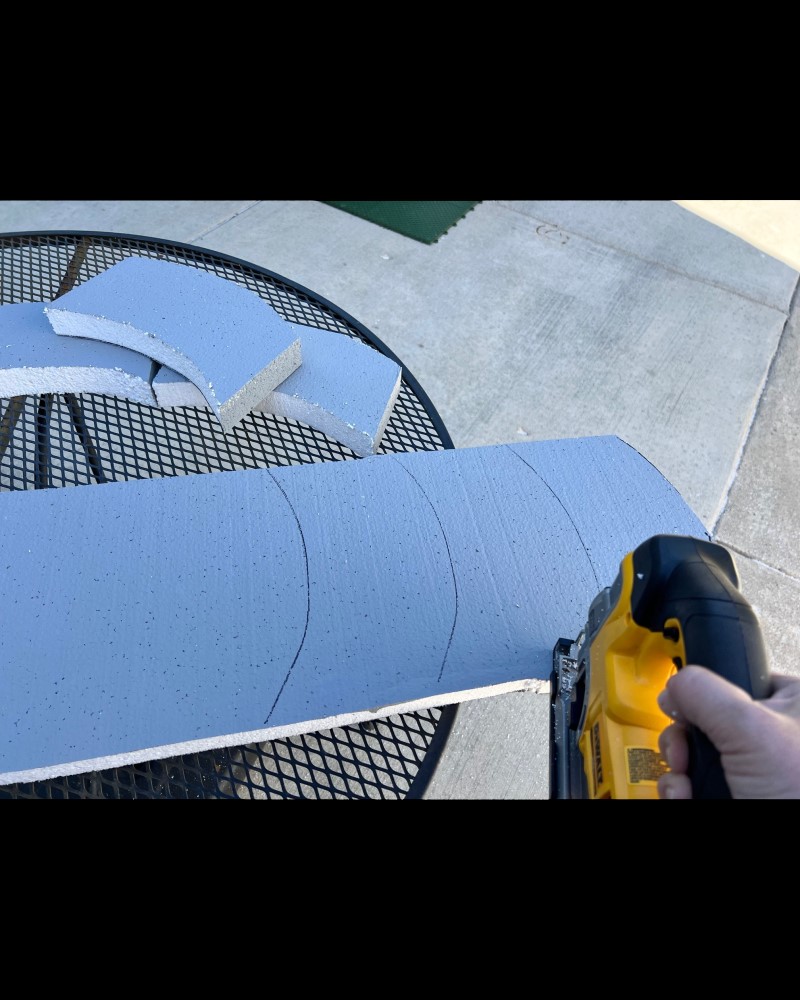
After they were dried, it was time to cut the brick shapes. You will want a slight curve, to match to curve on the outside of your can. My bricks were 6” deep.
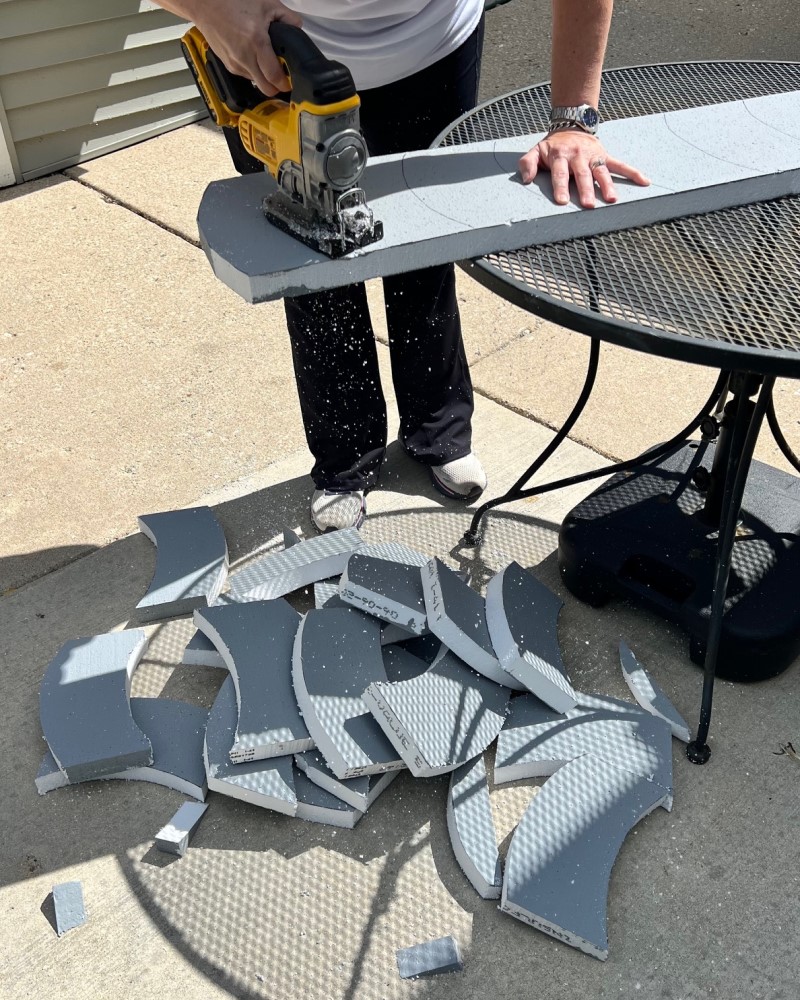
Once I had the curve and depth I wanted, it was just cut, cut, cut. I recommend doing this outside, as Styrofoam pieces go everywhere.
I had started to paint all the side edges of the cut pieces gray, but it seemed to take forever, and they needed to dry. I eventually decided I would assemble the foam bricks around the can and then paint them all once glued in place. You could also use the same color spray paint and get it done pretty quickly.
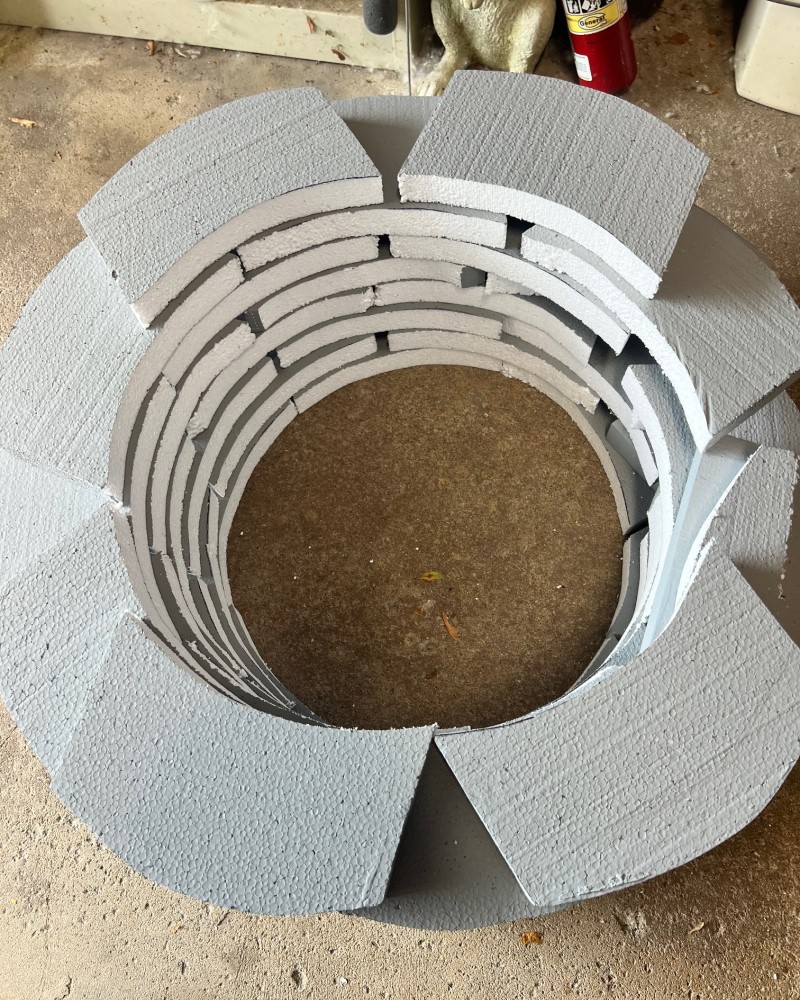
As with most of my projects, I did a trial run with the foam bricks I had already cut, to judge how many more I was going to need. While doing that, I also realized that the top part of my can was wider than the bottom.
Based on my trial run, I knew now that some of the bricks for the top would need to be shallower than the bottom ones, due to the bump out in the can and where the ladder rungs poke through.
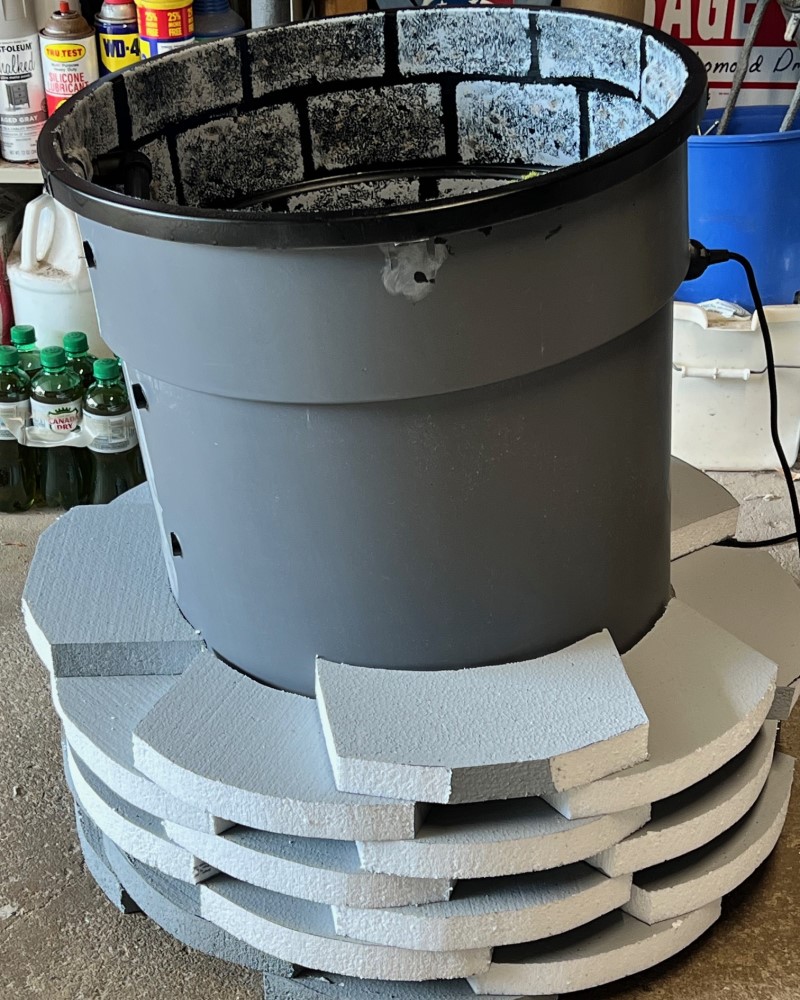
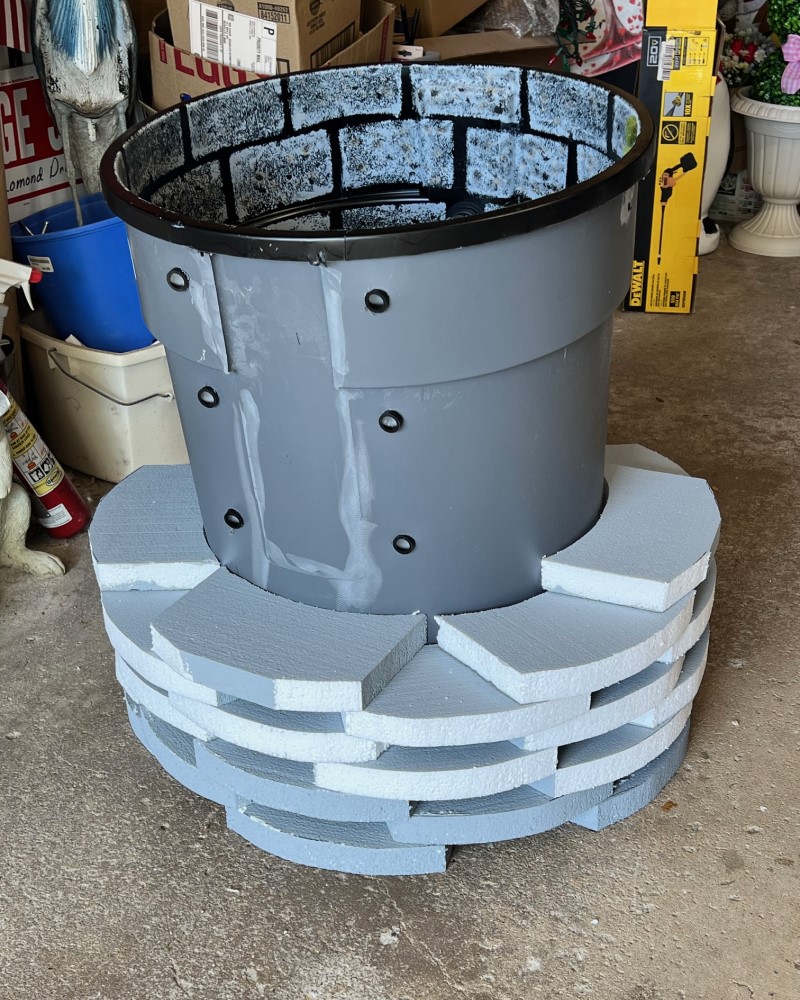
Now came two important decision changes for me. This is not something you need to adapt; it was my own personal preference. First, I decided I was not going to glue the outer foam stones/bricks to my can. I would glue them to each other as I went around, but not the can. This way, the can pulls out and the two pieces can be stored separately. I don’t really have room for something this big with all my other displays.
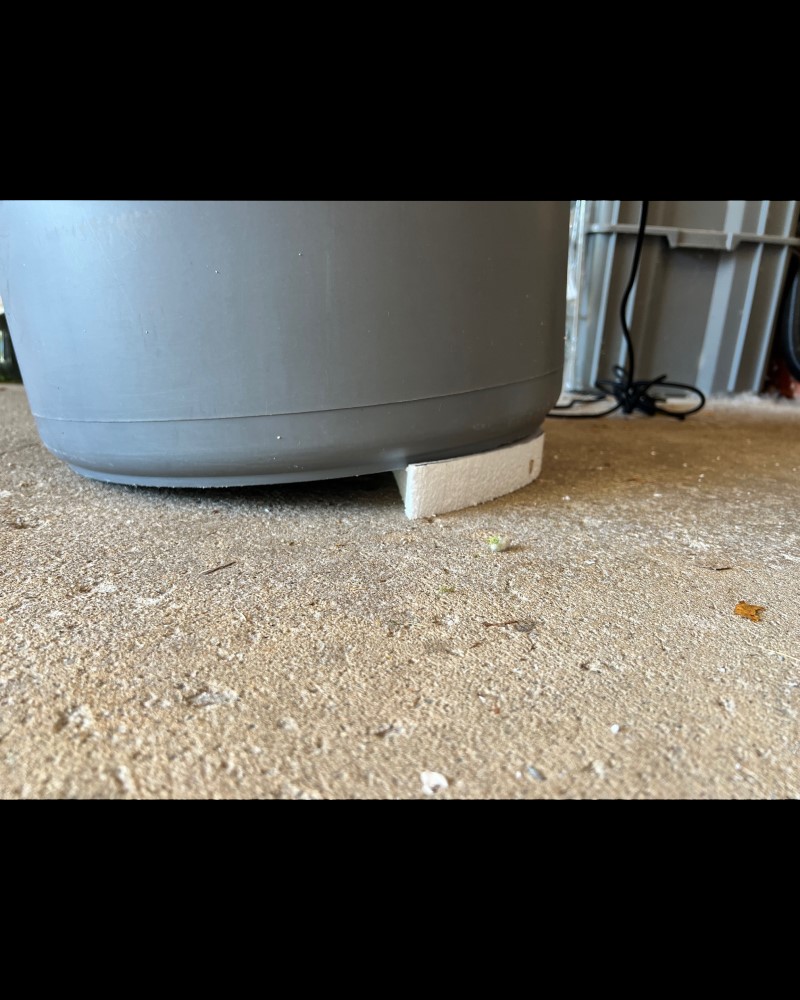
The second decision was to enhance the well so it could be seen better from the street or sidewalk. As this will be in my front yard, people would have to be curious enough to approach it. To do this, I decided the can inside the well needed to be angled slightly. Not a lot, just enough so the light could be seen in the well and casting outwards. I used another piece of the foam board and cut it to equal half the can and placed it under one side.

I wrapped the outside of the can with bubble wrap just so I wouldn’t accidentally glue the bricks to the can and give me a little spacing from the bricks for pulling the can in and out. You could use anything I would think, even newspaper. Important! I don’t have a picture of this, but you will need to work your bricks around where the light fixture is coming out of the can. So, I had to cut some smaller bricks to go around that area and leave a hole big enough for your hand to get into to put the lightfixture in after sliding the can in.
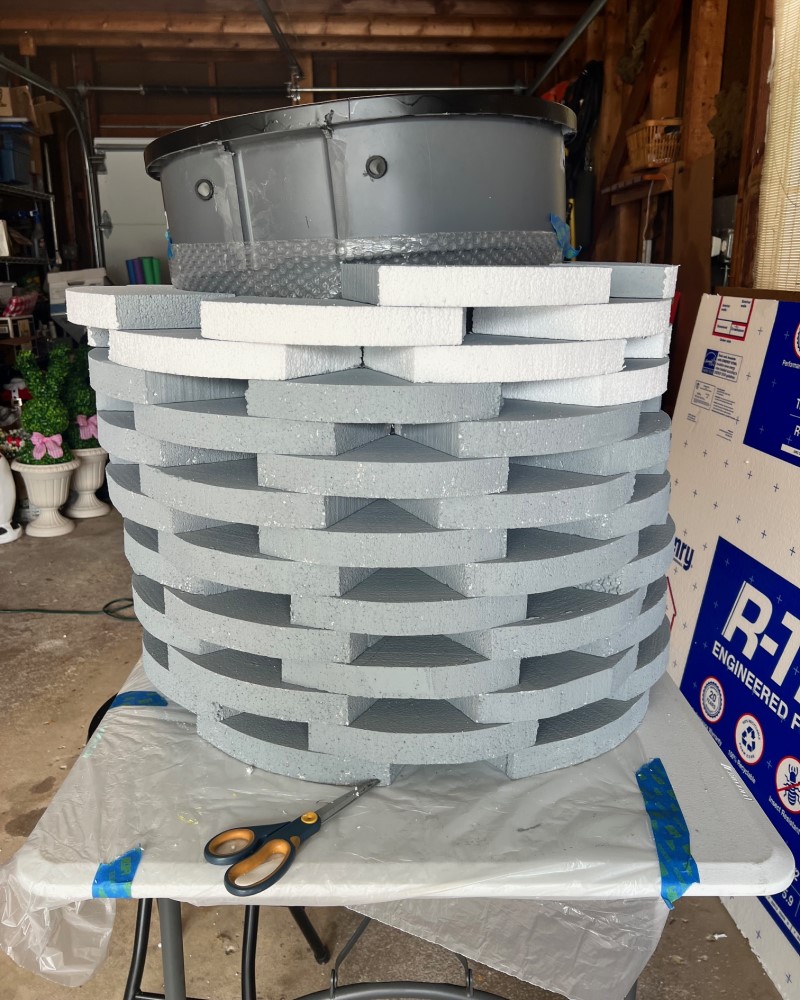
Now all the foam bricks were layered and glued together up to the top of the can. Since there is a slight tilt, the back side bricks are slightly higher than the front. Yes, the well looks like it’s leaning a little now, but I think that’s fine and goes along with a very old well that’s settled. It was more important to me to make it more visible from a distance.

I used some black spray paint to darken the areas where the bricks meet, and for an aged effect, randomly on the bricks.
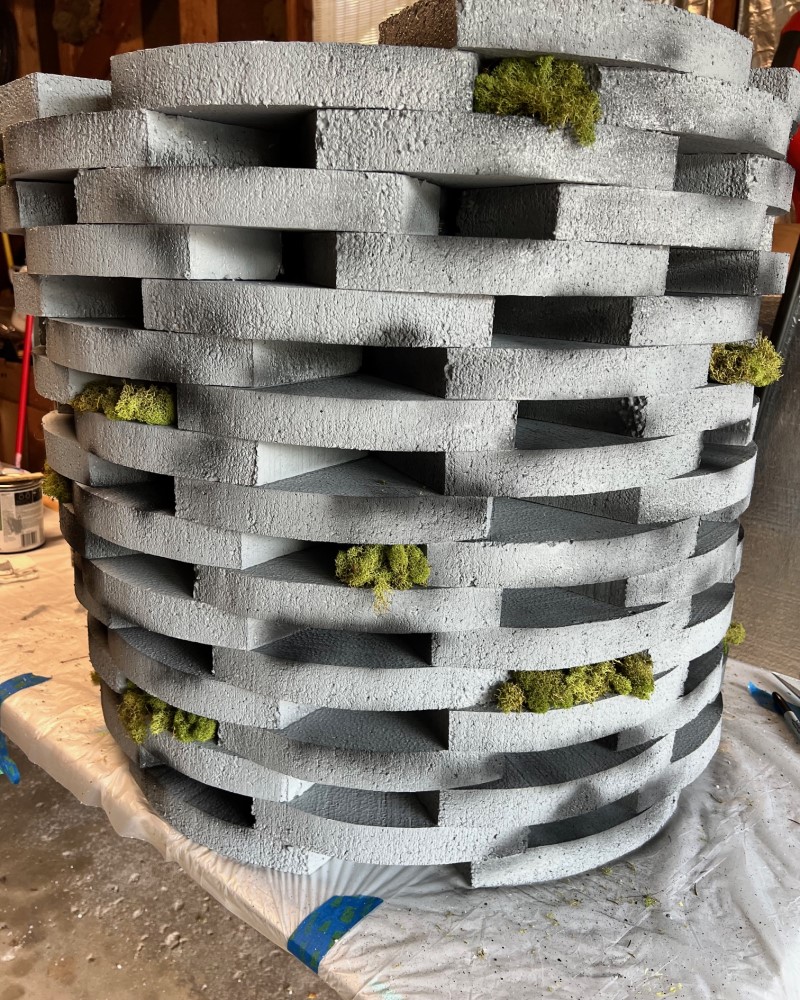
I also added moss in several locations around the well.
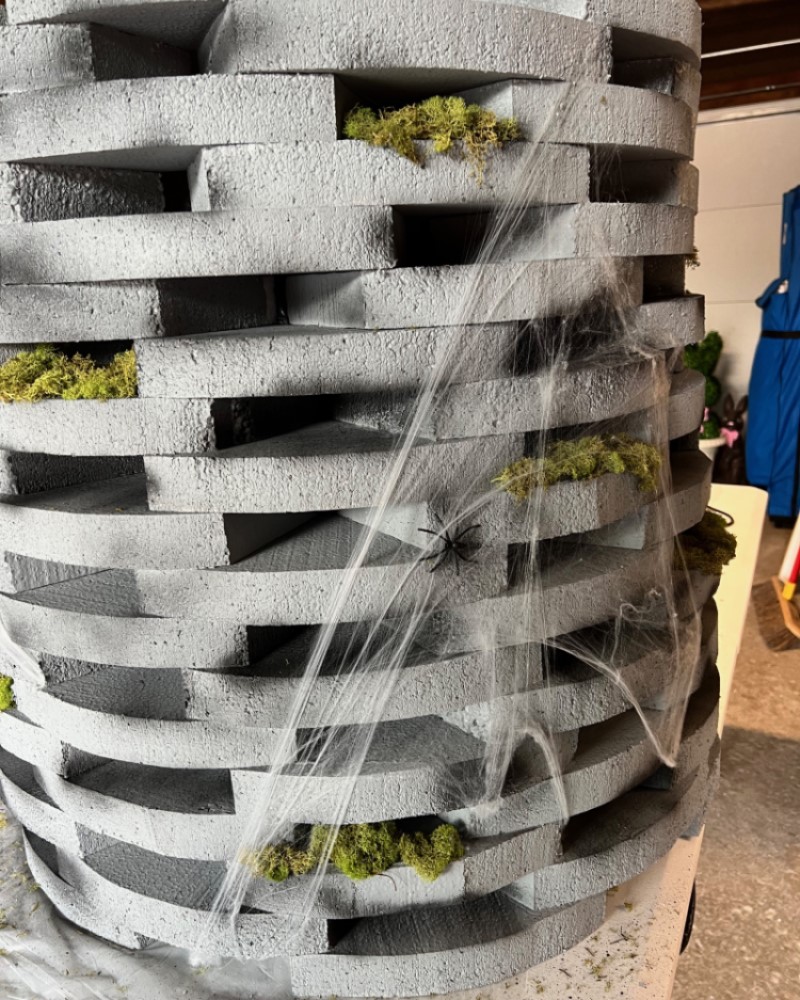
Finishing touches were some webs and spiders to the outside.
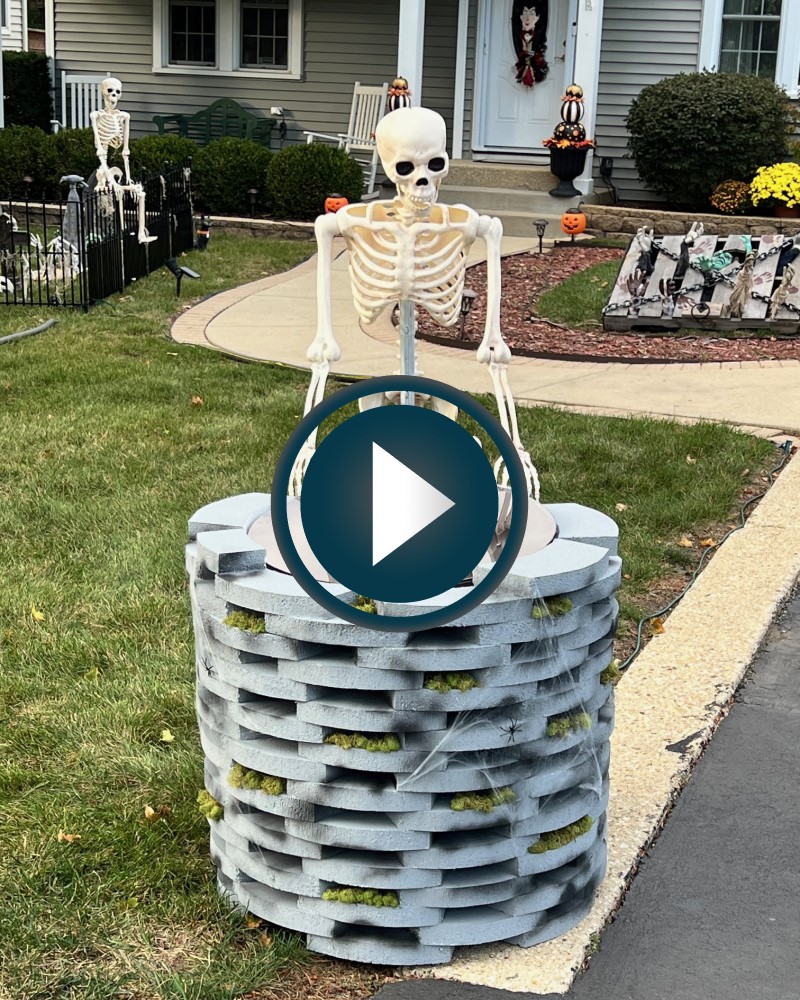
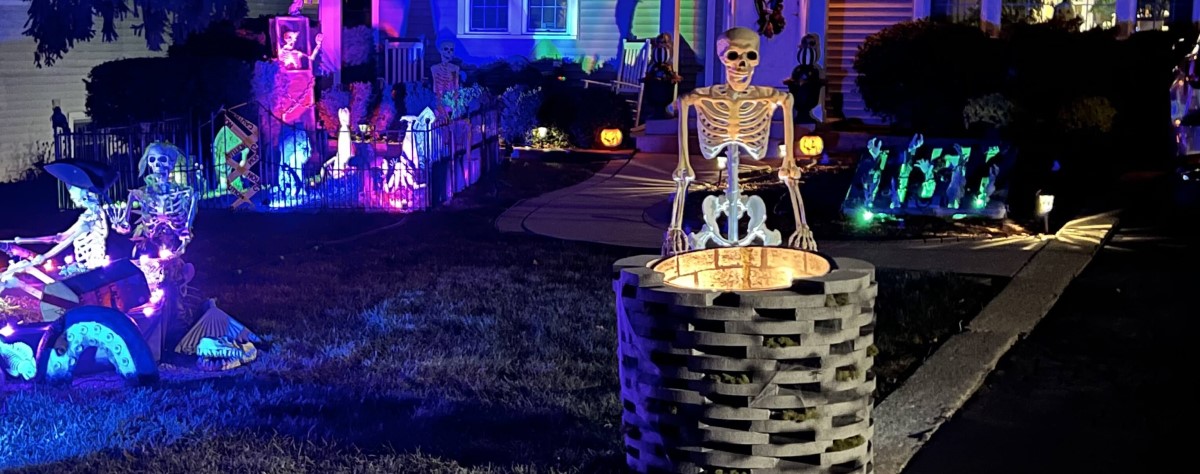
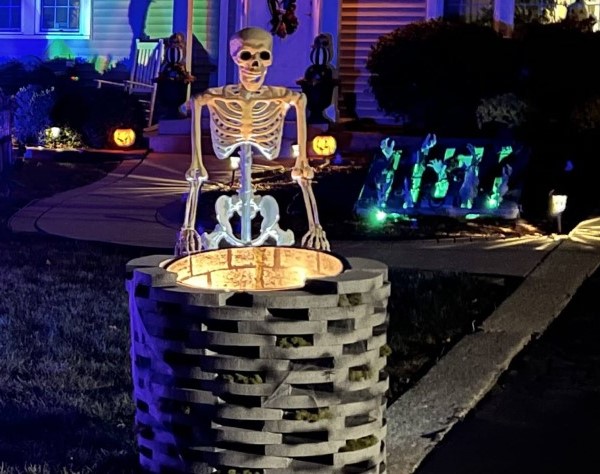
I enhanced the entire project by adding a skeleton looking down into the well. Play the video for a view of the well in its eerie nighttime glow (might take a few seconds to start).
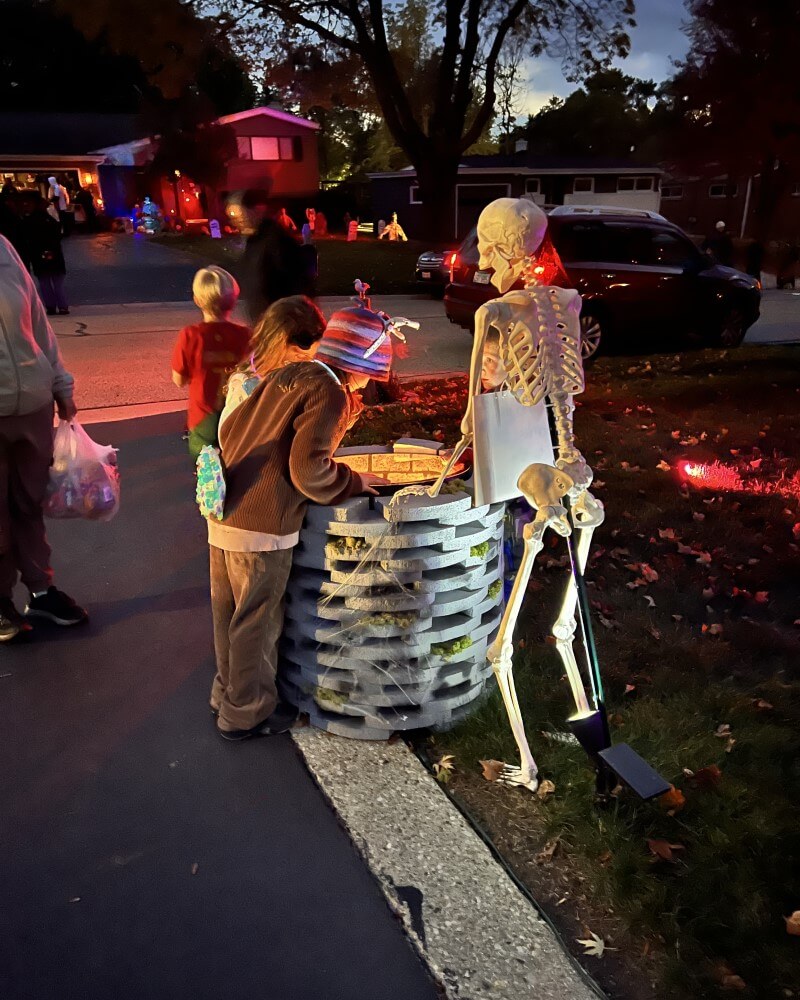
The Bottomless Well was a Halloween Night success!
Bottomless Well
A quick little walk-up video.
Bottomless Well
Come gaze into the abyss.
If you think you'd like to give this a try, below is a list of Amazon links for materials I used. Shopping through these links may earn me a small commission and helps me continue experimenting with projects and sharing what works.
Another resource I used for this project was Home Depot, for the PVC pipes, elbows, and insulation foam board.
Large Garbage Can (similar to project) Light Fixture & Cord Vintage Edison Light Bulb Hole Saw Drill Bit Round mirror (specify YOUR dimensions) Large Sponge Round Acrylic Top (specify YOUR dimensions) One-way Privacy Mirror Film Moss Full-size Glue Gun Full-size Glue Sticks (you’ll need them!) Webs and Spiders